10 Best DIY Home Organization Hacks for Renters
You're ready to transform your rental space into a haven of organization and productivity! Start by repurposing old furniture into functional storage solutions, like vintage dressers and wooden crates. Next, maximize your vertical storage space with high shelves and stackable containers. Identify hidden storage areas, like under-bed storage and closet nooks, and create a pegboard organizer for efficient storage. You'll also learn how to DIY shelving units, transform closets with dividers, and craft a storage ottoman bench. With these 10 DIY home organization hacks, you'll be well on your way to a clutter-free and functional living space - and there are even more creative solutions waiting for you.
Key Takeaways
• Repurpose old furniture into functional storage solutions, like turning vintage dressers into shelving units or using wooden crates as bookshelves.
• Maximize vertical storage space by using high shelves, stackable containers, and floating shelves to keep floors clear and create more space.
• Utilize hidden storage areas like under-bed storage bins, hollowed-out books with secret compartments, or decorative storage ottomans.
• Create organizational systems like pegboards with baskets and bins, or shelves with dividers to keep clutter at bay and make the most of rental space.
• Optimize closet spaces with tension rods, shelves, dividers, and stackable bins to create designated sections for different clothing items and essentials.
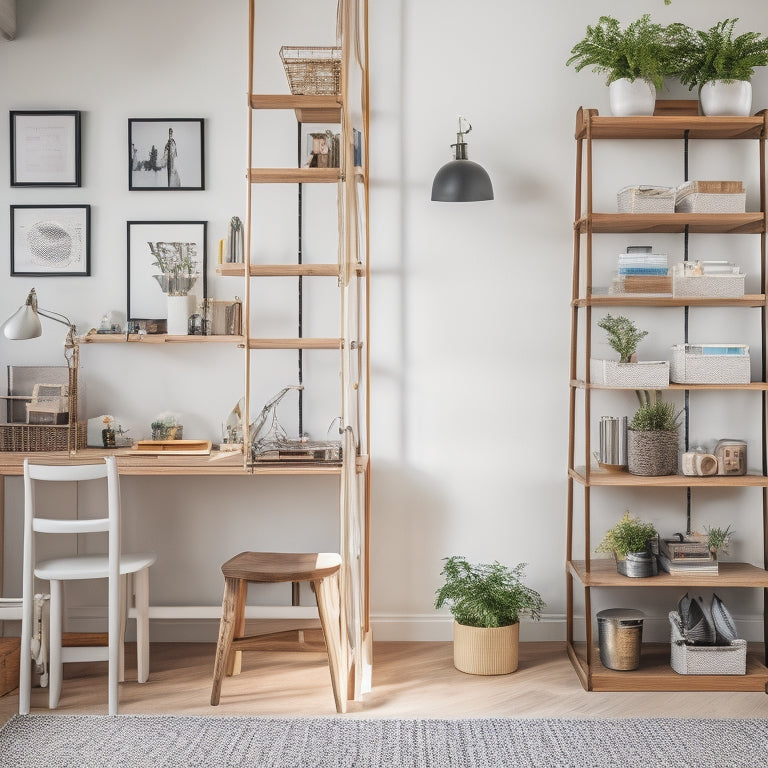
Repurpose Old Furniture Creatively
Transforming old furniture into functional storage solutions not only reduces waste but also adds a touch of personality to your home. So, begin by identifying which pieces can be repurposed creatively. You might have vintage dressers that can be refinished and repurposed as storage units for your living room or bedroom. Consider adding new hardware, paint, or stain to give them a fresh look.
Another great option is to upcycle wooden crates into shelves, coffee tables, or benches. You can add casters to make them mobile or attach them to a wall for added stability.
Before you start, take inventory of your available space and think about what you need to store. Measure your furniture and the spaces where you plan to place them to ensure a good fit. Don't be afraid to get creative and think outside the box.
For example, you can turn an old ladder into a bookshelf or use a vintage window as a room divider with storage. With a little imagination, you can turn your old furniture into functional and stylish storage solutions that reflect your personal style.
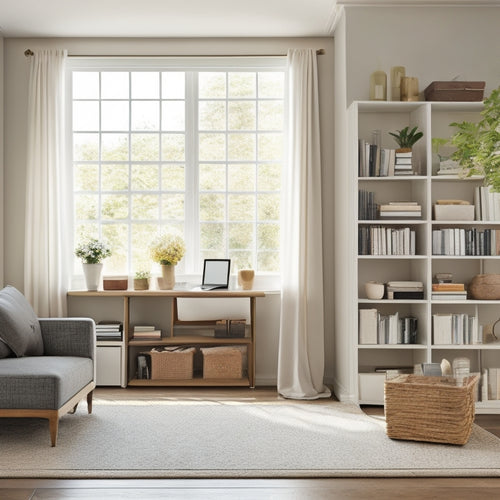
Maximize Vertical Storage Space
When you're short on floor space, it's time to look up! You'll be surprised at how much storage you can squeeze out of your walls by using them wisely.
Use High Shelves Wisely
You can access valuable storage space in your home by utilizing high shelves that often go unused, freeing up cluttered areas and keeping your belongings organized. This shelf organization hack is especially useful for renters who may not be able to make major changes to their space.
By using high shelves wisely, you can store items that you don't frequently use, such as seasonal decorations, out-of-season clothing, or books. This will help declutter your living areas and make the most of your available space.
One of the high shelving benefits is that it keeps items out of the way but still easily accessible. You can use stackable containers or bins to store items on high shelves, making it easy to identify what's inside without having to dig through everything.
Additionally, high shelves can help keep your floors and surfaces clear, making your space feel more open and airy. By maximizing your vertical storage space, you can create a more organized, clutter-free home that feels more relaxing and peaceful.
Install Floating Shelves
By installing floating shelves, you can create the illusion of more floor space while keeping your belongings within easy reach. This DIY project is perfect for renters who want to maximize their vertical storage space without damaging the walls.
When it comes to floating shelf styling, consider the overall aesthetic you want to achieve. You can choose from various materials, such as wood, glass, or metal, to match your home decor. For a modern look, opt for sleek and minimalist designs, while rustic or ornate shelves can add a touch of elegance.
Before you start the installation, be sure to follow some essential floating shelf installation tips. First, locate the wall studs to confirm the shelves can support the weight of your items. Next, use a level to verify the shelves are straight and even. Finally, use wall anchors or screws specifically designed for floating shelves to secure them to the wall.
With these tips, you'll be able to create a beautiful and functional storage system that adds value to your rental space.
Utilize Hidden Storage Areas
Maximize your home's potential by exploiting often-overlooked spaces, such as the area beneath your bed or inside cabinets, to stash items that are essential but not frequently used. This will help you declutter your living areas and make the most of your rental space.
| Hidden Storage Area | Ideal for Storing |
| Under Bed Storage | Out-of-season clothing, luggage, or linens |
| Inside Cabinet Storage | Infrequently used kitchen gadgets or special occasion dishes |
| Behind Furniture Storage | Decorative items, books, or office supplies |
| Closet Organization | Coats, shoes, or accessories that are out of season |
When utilizing hidden storage areas, consider the items you need to store and choose the most accessible and convenient spot. For instance, store out-of-season clothing under your bed or in a closet to free up space in your dresser or closet. By doing so, you'll be able to find what you need quickly and easily, and your living space will feel more organized and peaceful.
Create a Pegboard Organizer
You're about to create a pegboard organizer that will revolutionize your storage space.
Before you start, it's essential to plan and prepare your pegboard by:
- Deciding on the layout
- Choosing the right materials
- Considering the tools you'll need
Pegboard Planning Essentials
Determine the space where you'll install your pegboard organizer, considering the area's accessibility and the type of items you'll be storing. Think about the daily activities you'll be performing near the pegboard and the frequency of use. This will help you decide on the ideal location and size of your pegboard.
When it comes to pegboard project ideas, start by brainstorming the items you want to store. This will give you an idea of the types of hooks, bins, and accessories you'll need. Consider pegboard design tips like grouping similar items together and leaving enough space between hooks for easy access.
Creative pegboard solutions can be achieved by using baskets, bins, and shelves to maximize storage capacity.
Organizing with pegboards is all about creating a functional and efficient system. Think about the workflow and how you can optimize the space to reduce clutter and increase productivity. By planning carefully, you can create a pegboard organizer that meets your specific needs and helps you stay organized and focused.
Pegboard Installation Tips
With your pegboard design planned and materials ready, it's time to get hands-on and attach your pegboard to the wall, securing a sturdy and level installation that will support your organizational system.
To secure a successful installation, follow these tips:
-
Measure twice, drill once: Double-check your measurements to avoid errors and unnecessary holes in the wall.
-
Use the appropriate anchors: Choose wall anchors that can support the weight of your pegboard and accessories.
-
Level it up: Use a level to confirm your pegboard is straight and even.
-
Drill pilot holes: Prevent the pegboard from splitting by drilling pilot holes for screws.
-
Test the weight: Hang a few pegboard accessories to assess the weight capacity before adding more.
Pegboard Organization Ideas
Create a functional and personalized pegboard organizer by grouping similar items together and assigning a designated spot for each accessory. This will help you maintain a sense of order and make the most of your pegboard's storage capacity.
For a pegboard design idea, consider categorizing your items into sections, such as tools, cleaning supplies, and kitchen utensils. This will make it easier to find what you need when you need it.
Use hooks, bins, and baskets to store items of varying sizes. For pegboard tool storage, hang your most frequently used tools, like hammers and screwdrivers, within easy reach. Reserve the top section for less frequently used items, like seasonal decorations or infrequently used kitchen gadgets.
Take pegboard decor inspiration from online resources or home organization blogs to make your pegboard visually appealing. In the kitchen, use your pegboard for kitchen organization, storing spices, oils, or utensils. By organizing your pegboard thoughtfully, you'll create a space that's both functional and aesthetically pleasing.
DIY Shelving Units Easily
You can build a customized shelving unit that fits your space and style by repurposing reclaimed wood, crates, or IKEA hacks. This is especially useful for renters who want to maximize their storage without damaging the walls or committing to bulky furniture.
With a little creativity, you can create a functional and stylish shelving unit that suits your needs.
Here are some ideas to get you started:
- Use hanging planters to add greenery to your space while keeping your shelves clutter-free.
- Repurpose wire baskets as storage containers for books, linens, or kitchen utensils.
- Create a ladder bookshelf using reclaimed wood or crates for a rustic, industrial look.
- Add casters to your shelving unit to make it easy to move around or reconfigure.
- Incorporate decorative brackets or corbels to add visual interest and support to your shelves.
Declutter With Labels Effectively
By assigning a designated home to each item with a label, you'll maintain a clutter-free space and save time searching for misplaced items. Effective labeling techniques are essential to any organization system, as they help you quickly identify where items belong and prevent clutter from building up.
When designing your labels, keep it simple and concise. Use a clear font and a consistent design throughout your space to create a cohesive look.
Consider using labels with icons or colors to categorize items and make them easier to find. For example, you can use red labels for important documents and blue labels for decorative items. This will help you establish a visual system that's easy to follow.
Transform Closets With Dividers
Dividers breathe new life into cramped, chaotic closets, allowing you to maximize storage space and regain control over your wardrobe. By incorporating dividers into your closet organization strategy, you can create separate areas for different types of clothing, shoes, and accessories. This helps to maintain a sense of order and makes it easier to find what you need when you need it.
Here are some DIY storage solutions to explore:
-
Use tension rods to create separate sections for tops, bottoms, and dresses
-
Install shelves or cubbies for folded items like sweaters and jeans
-
Hang curtains or room dividers to section off areas for shoes or accessories
-
Utilize stackable bins or baskets to store out-of-season clothing
-
Create a 'launching pad' near the front of the closet for your daily essentials, like a hook for your keys and a tray for your wallet
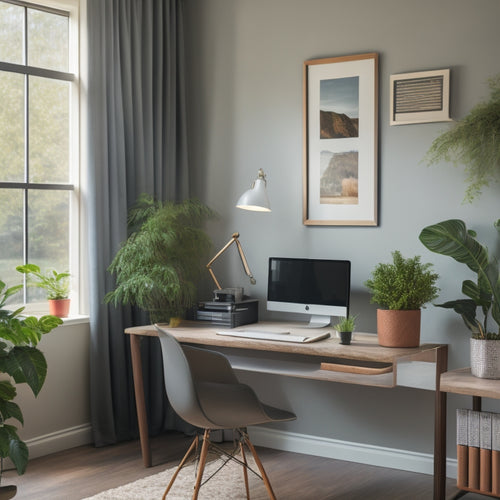
Make a Fold-Down Desk Station
When you're short on space, a fold-down desk station can be a game-changer. By creating a compact workspace that folds up when not in use, you'll optimize your desk space and free up valuable real estate in your home.
With a few simple materials and some DIY know-how, you can build a foldable workspace solution that meets your needs and keeps your workspace organized.
Desk Space Optimization
You can create a highly functional and space-efficient workspace by building a fold-down desk station that neatly tucks away when not in use. This is especially useful for renters who need to maximize their limited space.
By incorporating some clever design elements, you can optimize your desk space and stay organized.
Here are some must-haves to include in your fold-down desk station:
- A built-in drawer organizer to keep your office supplies within easy reach
- A cable management system to keep your cords and wires tidy
- A compact keyboard tray to free up desk space
- A built-in paper tray to keep your workspace clutter-free
- A small shelf for storing books, binders, or other essentials
Foldable Workspace Solution
To create a fold-down desk station that meets your specific needs, start by measuring the space where you'll be installing it and deciding on the features you want to include. Consider the type of work you'll be doing, the equipment you'll need, and the amount of storage you require. Once you have a clear idea of what you need, you can start planning your design.
Look for foldable desk solutions that can be mounted to a wall or placed on a door. These portable workspace options are perfect for renters who need a dedicated workspace without taking up too much floor space. You can find pre-made fold-down desks or DIY your own using a piece of plywood, hinges, and a few screws.
Add some decorative touches, such as a fun wallpaper or a few plants, to make your workspace feel more inviting.
When choosing your fold-down desk, think about the features that are must-haves for you. Do you need a built-in shelf for storage? A USB outlet for charging your devices? A tray for holding pens and paper? By considering your specific needs, you can create a fold-down desk station that's both functional and comfortable.
Craft a Storage Ottoman Bench
Get ready to repurpose a plain ottoman into a stylish storage bench by gathering essential materials like sturdy fabric, foam cushioning, and a wooden frame. This DIY project is perfect for renters who want to add functionality and style to their living space.
When it comes to fabric selection, keep in mind that you'll need a durable material that can withstand daily use. Consider upholstery tips like choosing a fabric with a high rub count and opting for a pattern that can hide stains.
Here are some essential steps to follow:
- Measure your ottoman and frame to ensure a perfect fit
- Cut your fabric and foam cushioning to size
- Attach the fabric to the frame using a staple gun or strong adhesive
- Add a hinged top for easy storage access
- Add decorative trim to conceal any seams or staples
Build a Window Seat Storage
Now that you've mastered the art of repurposing an ottoman, take your DIY skills to the next level by creating a window seat storage that doubles as a cozy nook and a clever hiding spot for clutter. This creative seating solution will not only provide additional storage but also create a comfortable reading nook perfect for relaxation.
To get started, consider the following factors:
| Factor | Description | Tips |
|---|---|---|
| Cushion customization | Choose a fabric that complements your room's aesthetic | Select a stain-resistant fabric for easy maintenance |
| Fabric selection | Opt for a durable, comfortable material | Consider velvet or linen for a cozy feel |
| Storage capacity | Determine how much storage you need | Measure the space to guarantee a perfect fit |
When building your window seat storage, don't forget to add a hinged top for easy access to the storage compartment. With a little creativity and some DIY know-how, you can create a functional and cozy reading nook that doubles as a clever storage solution.
Frequently Asked Questions
Can I Use Command Strips on Textured or Popcorn Ceilings?
You can use Command strips on most textured ceilings, but not popcorn ceilings, as they won't hold weight. For a secure hold, choose strips specifically designed for textured surfaces, and follow the manufacturer's instructions.
How Do I Organize Cords and Chargers in a Small Space?
"Good luck finding a spare inch in your tiny space, but seriously, you can tame the cord chaos with cable management boxes, a DIY charging station, and wire storage bins - sanity awaits!"
Are There Any DIY Organization Hacks for Renters With Pets?
You'll love these pet-friendly organization solutions! Create DIY pet storage ideas like a caddy for toys, a hidden litter box, and a pet bed with built-in storage to keep your furry friend's essentials tidy.
What Are Some Budget-Friendly Alternatives to IKEA Products?
You can find budget-friendly alternatives to IKEA products by scouring thrift stores for unique finds, using dollar store solutions, upcycling old furniture, and repurposing containers to create functional and stylish organizational systems that fit your needs.
Can I DIY Organization Projects With Limited Mobility or Disabilities?
You can definitely DIY organization projects with limited mobility or disabilities by exploring adaptive organization solutions, mobility-friendly DIY ideas, and accessible storage options that cater to your specific needs, ensuring a more manageable living space.
Related Posts
-
10 Essential Skills for Mastering Home Organization
You're ready to take control of your space and transform it into a haven of calm and productivity. Mastering home org...
-
Master Your Space With Digital Decluttering Tools
You're tired of feeling overwhelmed by digital clutter, wasting time searching for lost files, and struggling to focu...
-
Declutter Your Desk With These Online Tutorials
You're just one organized desk away from boosting your productivity, reducing stress, and achieving a sense of contro...


