10 Essential DIY Shelving Hacks for Tiny Spaces
You're living in a tiny space, and clever storage solutions are essential to keep your sanity and style intact. To maximize storage, think vertically with ceiling-reaching shelves, and repurpose old furniture like dressers and bookshelves. Get creative with wall-mounted shelves, corner shelves, and hidden storage spaces. Folding shelves, slide-out bins, and window shelves can also help. And, yes, you can even transform doors into shelves! With these DIY shelving hacks, you'll be able to create a clutter-free, organized, and visually appealing tiny space that reflects your style. Want to reveal more storage secrets and take your tiny space to the next level?
Key Takeaways
• Install shelves reaching the ceiling to maximize vertical storage space and keep frequently used items within easy reach.
• Upcycle old furniture pieces, like dressers and bookshelves, to create unique and functional storage solutions that reflect your personal style.
• Utilize wall-mounted shelves creatively by combining them with hooks, baskets, or planters to add texture, visual interest, and functional storage.
• Consider building shelves around corners to turn dead space into functional storage areas that are both visually appealing and practical.
• Incorporate hidden storage spaces, such as slide-out storage behind furniture or adhesive hooks, to keep clutter at bay and maintain a sense of openness in tiny spaces.
Maximizing Vertical Storage Space
By installing shelves that stretch all the way to the ceiling, you can capitalize on the often-wasted vertical space in your tiny room. This clever hack allows you to store items that you don't use frequently, such as seasonal decorations or out-of-season clothing, keeping them out of the way but still accessible.
To add some greenery to your space, consider incorporating hanging planters that trail down from the ceiling or sit atop a high shelf. This not only purifies the air but also creates a visually appealing display.
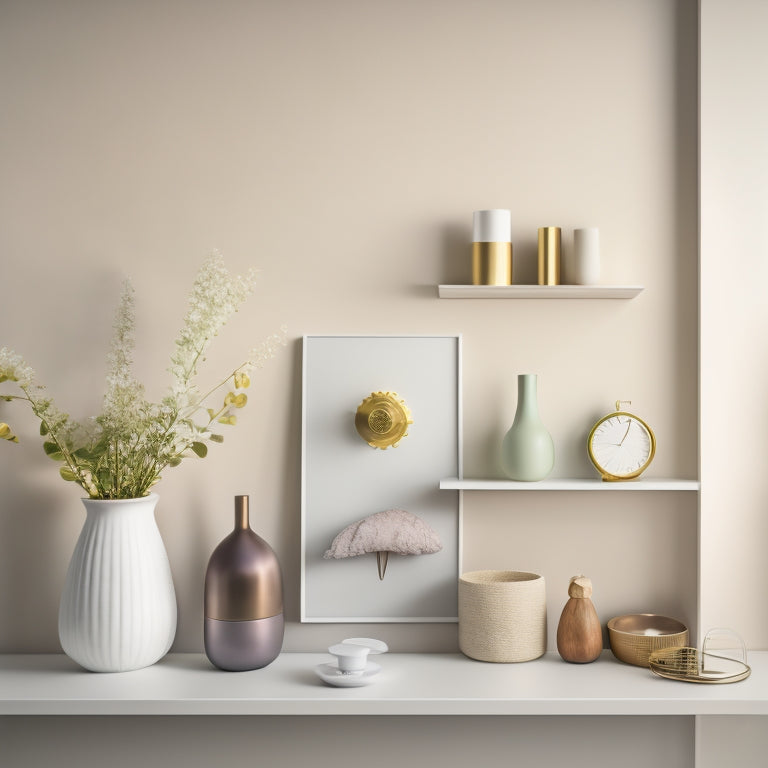
Floating shelves are another great option for maximizing vertical storage space. They provide a sleek, minimalist look while keeping your belongings organized and within reach. You can use them to display decorative items, store books, or even create a makeshift desk.
The beauty of floating shelves lies in their versatility, allowing you to customize your storage needs according to your unique space. By utilizing these DIY shelving hacks, you can create a more functional, clutter-free tiny space that feels more spacious and organized.
Repurposing Old Furniture Pieces
Transforming old furniture pieces into functional shelving units is a great way to give new life to items you might've otherwise discarded, while also adding a touch of personality to your tiny space.
You can upcycle dressers by removing the drawers and attaching wooden planks or crates to create a unique shelving unit. This won't only provide you with additional storage but also become a conversation piece in your home.
Repurposing bookshelves is another great way to add shelving to your tiny space. You can refinish or repaint an old bookshelf to match your home's aesthetic, and then attach it to a wall or place it in a corner. This will provide you with ample storage for books, decorations, and other knick-knacks.
You can also get creative by adding baskets, bins, or decorative containers to the shelves to add texture and visual interest. By repurposing old furniture pieces, you'll reduce waste, save money, and create a one-of-a-kind shelving unit that reflects your personal style.
Using Wall-Mounted Shelves Creatively
In tiny spaces, every inch counts, and wall-mounted shelves can be a game-changer when used creatively to maximize storage and style. By thinking outside the box, you can turn a blank wall into a functional and visually appealing space.
Here are some creative ways to use wall-mounted shelves:
-
Float and Hang: Combine floating shelves with decorative hooks to create a unique storage space for bags, hats, or accessories.
-
Basket Case: Attach wire baskets to the wall to store items like books, toys, or kitchen utensils, keeping them organized and out of the way.
-
Plant Perfection: Use hanging planters to add some greenery to your walls, purifying the air and beautifying your space.
- Layered Look: Install multiple shelves at different heights to create a visually interesting display for decorative items, such as vases, frames, or sculptures.
Building Shelves Around Corners
When building shelves around corners, you're not just filling a dead space - you're creating a functional area that can make a big impact on your tiny space's overall usability.
To get started, consider the design of your corner shelf: will it be a sleek, floating unit or a more rustic, bracketed installation?
Corner Shelf Design
You'll maximize storage capacity by building shelves around corners, where dead space often accumulates, and create a seamless visual flow. This clever design trick is especially useful in tiny spaces where every inch counts.
To achieve this, consider the following corner shelf design ideas:
-
Floating corner shelves: These shelves appear to be floating, creating a sleek and modern look. You can DIY them using wooden planks and hidden brackets.
-
DIY corner shelf brackets: Create custom brackets to fit your corner shelves. You can use metal or wooden materials and attach them to the wall for a sturdy hold.
-
Curved corner shelves: Design shelves that curve around the corner, providing a smooth shift between walls.
- Tiered corner shelves: Build multiple shelves that tier upwards, maximizing storage capacity and creating a visually appealing display.
Maximize Corner Space
Maximize Corner Space
By building shelves around corners, you're turning dead space into functional storage, effortlessly creating a more organized and clutter-free tiny space. This hack is especially useful in areas like kitchens, bathrooms, and closets where every inch counts.
To get started, measure the dimensions of your corner space and choose a shelf design that fits your style. You can opt for a simple floating shelf or a more elaborate corner shelf decor with decorative brackets. DIY corner shelf brackets are a great option if you're on a budget or want a customized look.
Here's a rough guide to help you plan your corner shelf project:
| Corner Type | Shelf Size | Bracket Type |
|---|---|---|
| 90-degree corner | 12" x 12" | Floating or decorative |
| Alcove corner | 18" x 24" | Adjustable or fixed |
| Bay window corner | 24" x 36" | Custom or floating |
| Angled corner | 12" x 18" | Decorative or DIY |
| Curved corner | 18" x 24" | Custom or floating |
Remember to adjust the shelf size and bracket type based on your specific needs and corner dimensions. With a little creativity, you can turn that dead space into a functional and stylish storage area.
Utilizing Hidden Storage Spaces
When you're living in a tiny space, every inch counts, and you're probably overlooking some prime real estate.
You're about to discover that the areas behind your furniture and under your stairs are more than just dead zones - they're opportunities waiting to be tapped.
Behind the Furniture
What hidden opportunities are waiting to be discovered behind your furniture, where dust bunnies and forgotten items often accumulate? By optimizing your furniture placement, you can access valuable storage space and maximize your tiny space's potential.
Here are some clever ways to utilize the space behind your furniture:
-
Install slide-out storage: Add slide-out drawers or shelves behind your bed or sofa to store linens, out-of-season clothing, or bedtime reads.
-
Use adhesive hooks: Hang bags, accessories, or cleaning supplies on adhesive hooks behind furniture, keeping them organized and out of sight.
-
Create a hidden compartment: Design a hidden compartment behind a piece of furniture, like a storage ottoman or a hollowed-out bookshelf, to stash valuable or sensitive items.
- Add a storage panel: Attach a storage panel to the back of a door or furniture piece, providing a convenient spot for hanging items or storing small objects.
Under the Stairs
Five feet of potential storage space lurk under your stairs, waiting to be transformed into a functional haven for your belongings.
You can create custom staircase shelves that fit snugly under the stairs, providing ample space for storing items like books, decorative vases, or even kitchen utensils. To maximize this hidden space, consider installing sliding drawers or cabinets that can be easily accessed when you need something.
For a more rustic look, you can opt for DIY staircase storage crates made from reclaimed wood or pallets. These crates can be mounted onto the wall or placed on the floor, adding a touch of industrial chic to your home.
If you're short on time, you can also repurpose old bookshelves or storage units to fit under the stairs. Whatever your style, the key is to think vertically and make the most of this often-wasted space.
With a little creativity, you can turn this hidden area into a functional and stylish storage solution that's perfect for your tiny space.
Creating Multi-Tiered Shelving Units
You can maximize your tiny space's storage potential by building a multi-tiered shelving unit that stacks vertically, making the most of your ceiling height. This design allows you to store more items in a smaller footprint, keeping your floor clear and creating a sense of openness.
Here are some tips to get you started:
-
Use floating shelves to create a sleek, modern look that appears to defy gravity.
-
Opt for tiered racks to separate items by size or category, making it easy to find what you need.
-
Choose adjustable shelves to accommodate items of different heights and sizes.
- Incorporate baskets or bins to store small items and keep them out of sight.
Incorporating Folding Shelves Designs
By incorporating folding shelves into your tiny space, you can create a flexible storage system that adapts to your changing needs. These innovative shelves can be easily set up or taken down, providing compact storage when you need it most.
Imagine having extra space for seasonal decorations, out-of-season clothing, or infrequently used kitchen gadgets. With folding shelves, you can store these items out of the way, freeing up valuable floor space.
When choosing folding shelves, look for space-saving designs that can be mounted to walls or placed in corners. Consider shelves with adjustable heights and widths to accommodate items of varying sizes. Additionally, opt for shelves with a sturdy construction and a weight capacity that suits your storage needs.
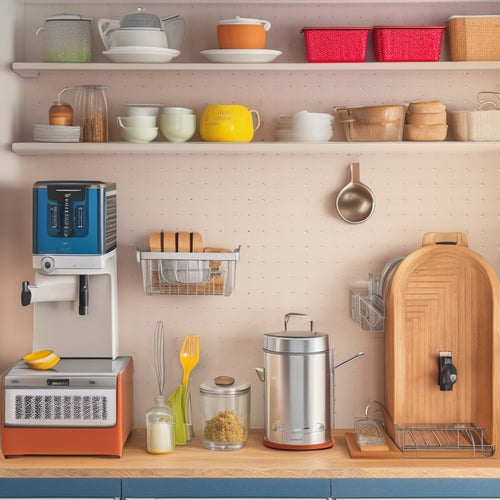
Installing Slide-Out Storage Bins
In tight spaces, slide-out storage bins can be a game-changer, providing effortless access to items tucked away in hard-to-reach areas. Whether you're dealing with a cramped pantry or a tiny bathroom, slide-out storage bins can help you maximize your space.
Here are some benefits of installing slide-out storage bins:
-
Easy access: No more digging through cluttered shelves or crawling on the floor to reach what you need.
-
Increased storage: Make the most of your space by storing items that are less frequently used.
-
Improved organization: Keep similar items together and organized, making it easier to find what you need.
- Space-saving design: Slide-out storage bins take up minimal space, making them perfect for small spaces.
In your pantry, use slide-out storage bins to store kitchen essentials like spices, oils, and snacks. In your bathroom, use them to store bathroom essentials like towels, toiletries, and cleaning supplies.
Designing Shelving Around Windows
Six inches of dead space between your windows and walls can become prime real estate for shelving, providing a clever solution for tiny homes and apartments. By installing window sill shelves, you can create a cozy nook for books, decorative items, or plants, all while maximizing natural light. This is especially useful for rooms with limited floor space, as it keeps the floor clear and creates a sense of airiness.
For a more minimalist design, consider floating window shelves. These sleek, wall-mounted shelves appear to be hovering above the window, creating a sense of visual flow and continuity. They're perfect for displaying small decorative items, like vases or sculptures, and can add a touch of sophistication to any room.
Plus, they're easy to install and can be adjusted to fit your specific window size. By incorporating shelving around your windows, you'll not only increase your storage space but also enhance the overall aesthetic of your tiny space.
Transforming Doors Into Shelves
You can repurpose doors as shelves to create a unique storage solution that's both functional and visually appealing, especially in areas where floor space is limited. This unconventional storage idea is perfect for tiny spaces, such as apartments, dorm rooms, or small homes. By transforming doors into shelves, you can maximize your storage capacity while adding a touch of creativity to your decor.
Here are some ideas to get you started:
-
Hinged door shelves: Attach hinges to a door and hang it on a wall, creating a swing-out shelf for easy access to stored items.
-
Over-the-door shelves: Utilize the space above a door by attaching a shelf or a series of shelves to store items like books, linens, or cleaning supplies.
-
Door-mounted shelves: Attach shelves directly to a door, creating a space-saving storage solution for small items like spices, oils, or beauty products.
- Sliding door shelves: Install sliding doors with built-in shelves to create a hidden storage area that's perfect for items you don't need frequent access to.
Frequently Asked Questions
Can I Use DIY Shelving Hacks in a Rented Apartment or Dorm Room?
Imagine transforming your cramped rental or dorm room into a cozy oasis. Yes, you can use DIY shelving hacks here! Opt for temporary solutions and creative storage ideas that are landlord-friendly, like removable shelves that won't damage walls.
How Do I Secure Heavy Objects on My DIY Shelves?
You'll want to guarantee heavy objects on your DIY shelves by exploring anchor options, like wall-mounted brackets, and weight distribution strategies, such as bracing techniques, to maintain stability and prevent collapse.
Are DIY Shelving Hacks Suitable for People With Limited Carpentry Skills?
You're wondering if DIY shelving hacks are within your reach, despite limited carpentry skills? Fear not! You'll find easy alternatives and beginner-friendly options that make it possible to create sturdy shelves without being a master carpenter.
Can I Mix and Match Different Shelving Styles in One Room?
You can definitely mix and match different shelving styles in one room, but be mindful of consistency to avoid visual chaos. Embrace eclectic design by creating harmony through shared materials, textures, or colors that tie the look together.
How Do I Clean and Maintain My DIY Shelving Units Effectively?
You'll be surprised to know that 80% of dust accumulation occurs on horizontal surfaces! To keep your DIY shelving units clean and maintained, create a monthly cleaning schedule, focusing on dusting and wiping down surfaces, and implement organization strategies like categorizing items by frequency of use.
Related Posts
-
Smart Storage for Small Kitchen Appliances
You can optimize your small kitchen's functionality by implementing smart storage solutions that efficiently stash sm...
-
Master Home Organization With These 5 Online Courses
You're about to gain control over your living space with an all-inclusive education in home organization, courtesy of...

