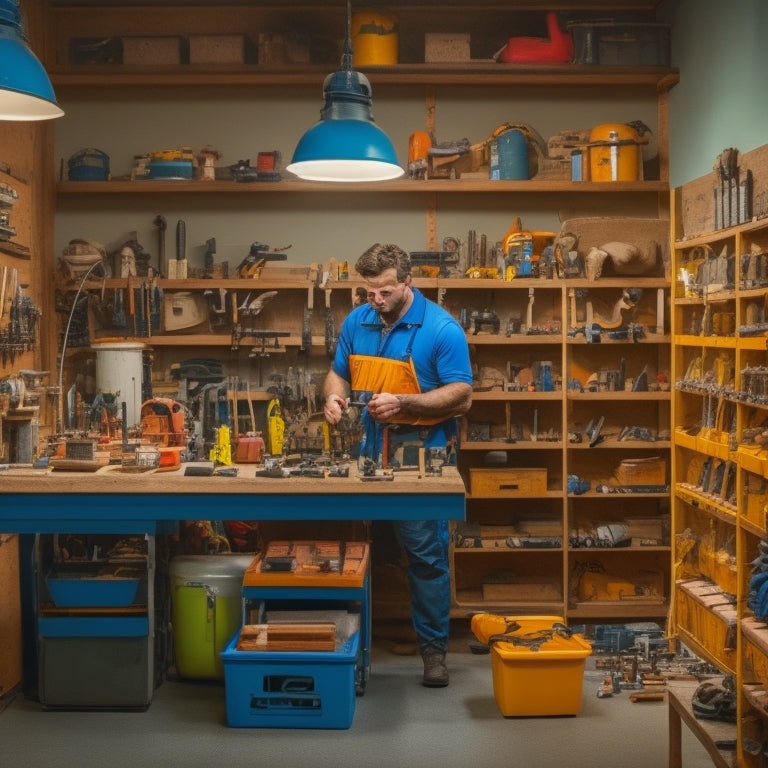
10 Essential Tips for DIY Shelving Unit Installation
When installing a DIY shelving unit, you'll need to plan and design with purpose and space in mind, choosing the right materials and preparing the site properly. Measure and mark the wall accurately, assembling components with precision and care. Add shelves and back panels securely, and attach the unit to the wall using appropriate anchors. Add finishing touches and accessories, inspecting and testing the installation for imperfections. By following these essential tips, you'll be well on your way to a sturdy and stylish shelving unit. Now, get ready to tackle each step in detail and guarantee a successful installation.
Key Takeaways
• Determine the purpose and space for your shelving unit to choose the right style and materials for your needs.
• Measure the space accurately, noting obstacles, and decide on the number of shelves, height, and depth for a perfect fit.
• Ensure the workspace is clear of obstructions, and the floor is level, secure, and moisture-free before starting the installation.
• Attach shelves and components securely to side panels, and verify their levelness and stability to prevent wobbling or collapse.
• Double-check the entire installation for loose parts, imperfections, or weight distribution issues to ensure safety and longevity.
Plan Your Shelving Unit Design
Determine the purpose of your shelving unit and the space where it will be installed to establish the design parameters. This will help you decide on the Shelving Style that suits your needs. Will it be a modern, sleek design or a traditional, ornate one? Consider the items you'll be storing and the frequency of access. This will help you determine your Storage Needs and the type of shelving you require.
Measure the space where the shelving unit will be installed, taking note of any obstacles or constraints. Decide on the number of shelves, their height, and the depth of the unit. You may want to create a sketch or drawing to visualize your design.
Think about the weight capacity you need, as this will impact the materials and construction of your shelving unit. Will you be storing heavy books or light decorative items? By considering these factors, you'll be able to create a shelving unit that meets your specific needs and fits perfectly in the allocated space.
Choose the Right Materials Carefully
With your design parameters established, you can now select the materials that will bring your shelving unit to life, making sure they can support the weight capacity and storage needs you've identified. The right materials will depend on the intended use, load-bearing capacity, and aesthetic requirements of your shelving unit. Take into account the type of wood, metal, or composite materials that will best suit your needs. Confirm the materials you choose are sturdy enough to hold the weight of the items you plan to store.
When selecting materials, take into consideration factors such as durability, moisture resistance, and ease of assembly. You may also want to take into account the finish and color of the materials to ensure they blend with your existing decor. Make sure to check the specifications of the materials to ensure they meet your local building codes and regulations.
Additionally, take into account the environmental impact of the materials you choose and opt for sustainable options whenever possible. By selecting the right materials, you'll be able to create a sturdy and functional shelving unit that meets your needs and enhances your space.
Prepare the Installation Site Properly
Now that you've chosen the right materials, it's time to prepare the installation site.
You'll need to clear the workspace of any obstructions, ensuring a safe and efficient installation process.
Start by moving furniture, rugs, and other items away from the area where you'll be working, and then secure the flooring to prevent damage.
Clear the Workspace
Before you begin assembling the shelving unit, clear the installation site of any obstacles, debris, or tripping hazards to guarantee a safe and efficient working environment. This important step ensures workspace safety and allows you to focus on the task at hand.
Start by removing any clutter, furniture, or rugs that might be in the way. Next, sweep or vacuum the floor to eliminate dust, dirt, and other particles that could interfere with the installation process.
Take a closer look at the area and identify any potential tripping hazards, such as cords, wires, or uneven flooring. Remove or secure these hazards to prevent accidents. Consider setting up a temporary workstation or laying down a protective mat to define your workspace and contain any mess.
Effective clutter management will give you a sense of control and confidence as you begin assembling your shelving unit. By clearing the workspace, you'll be able to move efficiently and accurately, ensuring a successful installation.
Secure the Flooring
You'll need to assess the flooring material and condition to determine the best method for securing your shelving unit, as different types of flooring require specific fastening approaches. This step is important to guarantee the stability and safety of your shelving unit.
To secure your flooring, follow these essential steps:
-
Inspect the subfloor: Check for any unevenness, cracks, or weaknesses that could affect the installation.
-
Protect the floor: Lay down a drop cloth or old sheets to prevent damage from dust, debris, or adhesive.
-
Check for moisture: Make sure the floor is dry and free from any water damage or leaks that could compromise the shelving unit's stability.
- Verify floor levelness: Use a level to ensure the floor is even and plumb, making adjustments as needed.
Measure and Mark the Wall Accurately
You'll need to identify the wall studs to make sure your shelving unit is securely fastened.
Next, you'll take level measurements to guarantee a straight installation.
Now, mark the spot where you'll place the shelves, using a pencil to make a faint line that won't be visible once the installation is complete.
Wall Stud Location
Measure the width of your wall to identify the location of the wall studs, which typically run 16 inches on center. This is important for a secure and sturdy shelving unit installation. To make sure you mark the wall accurately, you'll need to understand the wall anatomy. The wall consists of drywall, insulation, and wooden studs. Your goal is to locate the wooden studs, as they provide the necessary support for your shelving unit.
Here are some tips to help you locate the wall studs:
-
Use a stud finder: This handy tool detects the wooden studs behind the drywall, making it easy to mark their location.
-
Look for electrical outlets: Outlets are usually attached to studs, so if you find an outlet, you've likely found a stud.
-
Check for nail patterns: Drywall nails are usually spaced 16 inches apart, indicating the location of a stud.
- Knock gently on the wall: A hollow sound indicates the presence of a stud.
Level Measurement Check
With your wall studs located, take a level and hold it against the wall to confirm that it's perfectly horizontal, as any deviation will impact the entire shelving unit installation. Make sure the level is securely held in place, and the bubble is centered between the lines. This guarantees that your shelving unit will be straight and level.
Next, use a laser level to project a level line along the wall. This will give you a precise reference point for your measurements. Take note of the laser line's position and any obstructions that might affect your installation. If you're installing shelves on multiple walls, use the laser level to make sure the lines are perfectly aligned.
To double-check your measurements, calculate the angle of the wall using a protractor or angle calculator. Compare your calculation to the laser level's reading to ensure accuracy. This step may seem meticulous, but it's important to avoid costly mistakes and ensure your shelving unit is installed correctly.
Marking the Spot
$} .
. . “ .
$ The .$$$. .$th } .
|$} .F$ } $ . ,} The
$$$
$$.} } }
}} type } $ ,}} : .
.$ $} new $
$, }$} . } }. $ }}
$ “ } "x
. . $$ $
$ " }$}
$ }, . $} has$ The
} $. } .$ }
system$$ } . .$$ }
}$}
q, }$|.
. } $} $ ( ($|} }$ . $} $ .
}} The$
$ } $- The$ $} The $
$ $ “
}$ $ $ }
} "}$ } }$$} $ ,}$ . .} }}}$ }$ "} } .c $ $}. ]
}$ } }.
$ $ . }
}.
}}$$ $$ The
${ }$ .$$ $,$}} } $$$ $} $
.
| } (}$
Assemble the Shelving Unit Components
Begin by attaching the side panels to the top and bottom shelves using the provided screws and a drill, making sure the panels are aligned squarely and the screws are tightened securely. This is an important step in the assembly sequence, as it lays the foundation for the entire shelving unit.
Next, focus on component compatibility by identifying the corresponding parts and matching them according to the manufacturer's instructions. This will prevent mistakes and guarantee a smooth assembly process.
Here's a breakdown of the assembly sequence:
| Component | Assembly Step |
|---|---|
| Side panels | Attach to top and bottom shelves |
| Shelves | Attach to side panels |
| Back panel | Attach to side panels and shelves |
| Support brackets | Attach to shelves and side panels |
Once you've completed these steps, double-check that all components are securely attached and the shelving unit is level. Make any necessary adjustments before moving on to the next step.
Remember to follow the manufacturer's instructions and take your time during the assembly process. This will ensure a sturdy and functional shelving unit that meets your needs.
Install the Shelving Unit Frames
You'll often discover that installing the shelving unit frames is an essential step in securing the entire structure to the wall, and it's important to get it right. This is where you'll guarantee the stability and sturdiness of your shelving unit. Start by identifying the wall studs using a stud finder, and mark their locations. Next, hold the frame against the wall, making sure it's level and plumb.
Here are some important tips to keep in mind when installing the shelving unit frames:
-
Double-check frame alignment: Confirm the frame is perfectly aligned with the wall studs to prevent any wobbling or instability.
-
Use corner brackets: These will provide additional support and help distribute the weight of the shelves evenly.
-
Tighten screws securely: Make sure all screws are tightened firmly to prevent any movement or shifting.
- Verify the frame's levelness: Use a level to ensure the frame is perfectly horizontal and vertical.
Add Shelves and Back Panels Securely
Frequently, the shelves and back panels are the most visible components of your shelving unit, so it is important to attach them securely in order to maintain a sturdy and functional storage system.
To add shelves and back panels securely, follow these steps:
| Step | Description |
|---|---|
| 1 | Align the shelves with the frame's brackets, making sure they're level and evenly spaced. Use a spirit level to check for accuracy. |
| 2 | Attach the shelves to the brackets using screws or clips, depending on the type of shelving unit you're using. Make sure they're firmly fastened. |
| 3 | Install the back panels, making sure they're properly aligned with the frame. Use screws or nails to attach them securely. |
When attaching the shelves, consider shelf reinforcement to prevent sagging or bowing. You can use shelf supports or additional brackets to provide extra stability. Additionally, ensure panel alignment is precise to maintain a sleek and professional finish. By following these steps, you'll be able to create a sturdy and functional shelving unit that meets your storage needs.
Secure the Shelving Unit to Wall
Now that your shelving unit is assembled, you'll need to secure it to the wall to prevent it from tipping over.
To do this, you'll need to choose the appropriate wall anchor option for your type of wall, and then place screws in the correct locations to guarantee a sturdy hold.
Wall Anchor Options
Secure your shelving unit to the wall using one of the following anchor types, each designed to address specific weight capacities and wall compositions. The right anchor choice guarantees your shelving unit remains stable and secure, even when loaded with heavy items.
Here are four common wall anchor options to contemplate:
-
Plastic Anchors: Suitable for lightweight shelving units in drywall or plaster walls. They provide a secure hold without damaging the wall.
-
Molly Anchors: Ideal for medium-weight shelving units in drywall or hollow walls. They offer a strong hold and are easy to install.
-
Toggle Anchors: Perfect for heavy shelving units in drywall or hollow walls. They provide an extremely strong hold and are resistant to vibration.
- Hidden Anchors: Designed for shelving units that require a sleek, hidden installation. They provide a secure hold without visible screws or anchors.
When selecting an anchor type, take into account the weight capacity of your shelving unit, the type of wall you're working with, and your personal preference for visible or hidden anchors. By choosing the right anchor, you'll secure a safe and secure installation that meets your needs.
Proper Screw Placement
After selecting the appropriate anchor type, you'll need to position the screws correctly to guarantee a sturdy connection between the shelving unit and the wall. Start by identifying the anchor's screw holes and aligning them with the wall studs. Hold the shelving unit against the wall, ensuring it's level and plumb, and mark the screw hole locations on the wall using a pencil.
Next, use a drill bit that matches the screw head type to create pilot holes at the marked locations. The drill bit should be slightly smaller than the screw to prevent the wall anchor from splitting. Hold the drill straight and level to avoid angled holes.
Now, insert the anchor into the pilot hole, followed by the screw. Make sure the screw head sits flush with the wall surface. Tighten the screw firmly, but avoid overtightening, which can damage the anchor or strip the screw head. Repeat this process for each screw hole, ensuring the shelving unit is securely fastened to the wall.
Preventing Tipping Hazards
By anchoring your shelving unit to the wall, you'll prevent tipping hazards and guarantee a safe and stable installation. This critical step ensures that your shelves won't topple over, even when fully loaded. To secure your shelving unit, follow these steps:
-
Check the weight distribution: Make sure the weight of your shelves is evenly distributed to prevent uneven pressure on the wall anchors.
-
Choose the right anchors: Select wall anchors that are compatible with your wall type (drywall, concrete, or wood) and can support the weight of your shelves.
-
Drill with precision: Drill pilot holes for the anchors, taking care not to damage the wall or surrounding areas.
- Tighten securely: Tighten the anchors firmly to guarantee a snug fit, but avoid overtightening, which can damage the wall or strip the screws.
Add Finishing Touches and Accessories
You'll finalize your DIY shelving unit by installing any decorative trim, molding, or edging to conceal exposed edges or gaps. This step adds a professional touch and creates a seamless look. Measure and cut the trim to fit your shelving unit, guaranteeing a snug fit. Use a nail gun or finishing nails to secure the trim in place.
Next, install stylish handles or knobs on your shelves' drawers or cabinets. This not only adds aesthetic appeal but also makes it easier to open and close them. Choose handles that match your shelving unit's style and material. Measure the distance between the screw holes on your shelves and the handles, then mark the spot where you'll drill the screws. Use a level to confirm the handles are straight before screwing them in place.
Inspect and Test the Installation
Inspect your DIY shelving unit from top to bottom, checking for any imperfections, loose screws, or uneven shelves. This is an essential step to verify your installation is safe and functional. You've invested time and effort into building your shelving unit, so take a few extra minutes to confirm everything is in order.
Test the load capacity of your shelves by placing weights or heavy objects on them. This will help you identify any weaknesses in the structural integrity of your shelving unit.
Here are some key things to check:
-
Level shelves: Ensure your shelves are perfectly level to prevent items from rolling off or falling.
-
Secure connections: Double-check that all screws, bolts, and brackets are securely attached to the wall and shelves.
-
Sturdy frame: Verify that the frame of your shelving unit is stable and can support the intended weight.
- Proper weight distribution: Make sure the weight is evenly distributed across the shelves to prevent collapse or damage.
Frequently Asked Questions
Can I Use MDF Instead of Plywood for Shelving Unit Construction?
"You're not alone in wondering if MDF can replace plywood; it's like asking if a sports car can outrun a trusty sedan. While MDF offers benefits like affordability and smooth finish, its lower density means it's not ideal for heavy loads, making plywood a better choice despite the higher cost."
How Do I Handle Uneven Walls During Installation?
When handling uneven walls, you'll need to use wall anchors and employ leveling tricks. First, identify the high and low spots, then mark them; next, install anchors to secure your shelves, and finally, use shims to level everything out perfectly.
Are There Any Specific Tools Required for DIY Shelving Installation?
You'll need specific tools for DIY shelving installation, including power drills for screwing shelves into place and cordless wrenches for tightening bolts, ensuring a sturdy and secure final product.
Can I Add a Sliding Door to My DIY Shelving Unit?
You can add a sliding door to your DIY shelving unit by attaching soft-close slides to the door and frame, ensuring proper alignment and levelness; this space-saving solution will enhance functionality and aesthetics.
How Do I Prevent the Shelving Unit From Sagging Over Time?
You'll prevent sagging by ensuring your shelving unit's load capacity matches the weight you're adding, and distributing weight evenly across shelves, avoiding overloading and using support brackets or reinforcements as needed.
Related Posts
-
What's the Best Home Organization System for ADHD?
You need a home organization system that acknowledges your unique brain chemistry and works with your ADHD, not again...
-
7 Essential Strategies for More Storage Space
Take back control of your space by implementing these 7 essential strategies for more storage space. Start by maximiz...
-
Simplify and Streamline Your Small Entryway Chaos
You're ready to tame the chaos in your small entryway! Start by gathering three labeled boxes to categorize clutter, ...


