Crafting the Perfect Resin 3D Printing Haven
You're about to create a dedicated space for resin 3D printing, where precision, safety, and efficiency come together to produce exceptional prints. Start by setting up a well-ventilated, secluded spot with stable temperature and humidity levels. Implement ventilation solutions and keep the area quiet and away from direct sunlight. Next, master resin management by storing resins in a cool, dark place, shaking bottles before use, and filtering out debris. Stay on top of printer maintenance, wear protective gear, and follow essential safety precautions. With these fundamentals in place, you'll be prepared to fully realize the potential of your resin 3D printing haven.
Key Takeaways
• Create a well-ventilated, secluded spot with stable temperature and humidity levels for optimal printing conditions.
• Implement essential resin management habits, including storing resins in a cool, dark place and filtering resin to remove debris.
• Develop a routine maintenance schedule to ensure printer longevity, including regular checks and calibration of the build plate and Z-axis.
• Prioritize safety precautions, such as wearing protective gear and handling resins in a well-ventilated area, to minimize health and environmental risks.
• Master post-processing and finishing techniques, including gentle cleaning and UV light curing, to achieve a professional-looking finish.
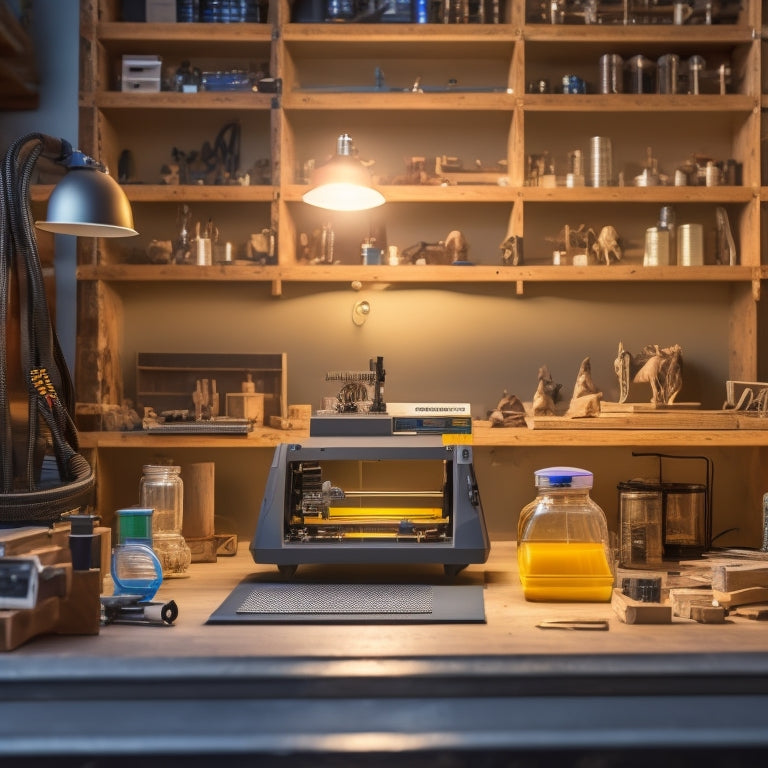
Setup and Environment
When setting up your resin 3D printing haven, choose a well-ventilated, secluded spot that provides stable temperature and humidity levels, away from direct sunlight, to guarantee ideal printing conditions. You don't want your prints to be ruined by drafts or temperature fluctuations!
Opt for a quiet corner with minimal foot traffic to reduce distractions and resin messes. Implement ventilation solutions like a box fan to evacuate fumes and establish a safe working environment.
Workspace optimization is key, so allocate enough space for your printer, post-processing area, and proximity to power outlets. Consider a private area for smaller print farms and maintain cleanliness to prevent resin messes from accumulating.
Resin Management Essentials
To guarantee excellent printing results and prevent resin waste, it's important to develop good resin handling and storage habits. Start by storing resins in a cool, dark place to prevent solidification due to light exposure.
You'll also want to master some essential techniques to keep your resin game strong. Here are some resin management essentials to keep in mind:
-
Shake resin bottles before each use to ensure consistent viscosity.
-
Filter resin to remove debris and prevent clogs.
-
Keep resin containers sealed when not in use to prevent contamination.
-
Dispose of resin properly to avoid environmental harm.
-
Use a dedicated cabinet or toolbox with spill-proof lining for resin storage.
Printer Maintenance Mastery
You'll need a set of essential tools and a routine maintenance schedule to keep your resin 3D printer running smoothly and producing high-quality prints. Don't get caught off guard by a clogged printer or a messy resin tank - stay on top of maintenance with regular checks and troubleshooting tips.
Calibration tricks, like adjusting the build plate and Z-axis, will guarantee precise prints. Remember to store resin materials properly, considering resin compatibility and material storage to prevent contamination.
Keep your printer in top shape by lubricating sliding surfaces, monitoring vat film and LCD, and testing print quality. With a solid maintenance routine, you'll be printing like a pro in no time!
Safety Precautions and Best Practices
How can you guarantee a safe and healthy working environment while handling resin 3D printing materials and equipment?
By following some essential safety precautions and best practices, you can minimize risks and ensure a smooth printing experience. Here are some vital tips to get you started:
-
Wear protective gear like nitrile gloves, goggles, and a mask to prevent skin contact and inhalation of resin fumes.
-
Handle resins in a well-ventilated area, and avoid direct sunlight to prevent solidification.
-
Store resins in a cool, dark place, and use a dedicated cabinet or toolbox with spill-proof lining.
-
Shake resin bottles before each use, and filter resin to remove debris.
-
Dispose of resin properly to avoid environmental harm, and wash your hands thoroughly after handling resins.
Post-Processing and Finishing Techniques
After carefully removing your print from the build plate, treat it with a gentle touch to prevent damage, and then clean it thoroughly with isopropyl alcohol or specialized cleaners to remove any excess resin.
Next, you'll want to focus on surface smoothing and polishing techniques to get that showroom shine. Apply a UV light curing process to harden your print, making it more essential and resistant to scratches. Don't forget to use techniques like sanding or filing to remove any layer lines or imperfections.
With patience and practice, you'll be able to achieve a glossy, professional-looking finish that'll make your prints stand out. Remember, post-processing is just as vital as printing itself, so take your time and don't rush through this critical step.
Frequently Asked Questions
Can I Use a Dehumidifier to Control Humidity Levels in My Print Space?
When tackling humidity control, you're on the right track considering a dehumidifier. First, invest in humidity sensors to monitor levels in your space.
Then, strategically place your dehumidifier to maximize its effectiveness. Don't just plop it anywhere - think about air circulation and the dehumidifier's capacity.
How Often Should I Replace the Vat Film or LCD in My Resin Printer?
Did you know that a typical resin 3D printer can produce up to 10,000 layers before needing a vat film replacement?
When it comes to replacing the vat film or LCD in your resin printer, you should aim to do so every 300-500 prints, depending on the manufacturer's guidelines and your usage.
Monitor the vat lifespan and film durability, as worn-out components can compromise print quality.
Keep an eye out for signs of wear, like scratches, cracks, or decreased print adhesion, and replace them promptly to guarantee peak performance.
Are There Any Eco-Friendly Resin Options Available for My 3D Printer?
You're wondering if you can go green with your resin printing, right? Good news: eco-friendly options are emerging!
Look for sustainable materials like plant-based resins, biodegradable alternatives, or even resins made from recycled plastics. Some brands offer environmentally responsible formulations that reduce waste and minimize environmental impact.
When shopping, check for certifications like biodegradable or compostable labels. Remember, every small step towards a greener 3D printing future counts!
Can I Use a UV LED Lamp for Curing Prints Instead of a Dedicated Chamber?
Did you know that 70% of resin 3D printing enthusiasts use UV lamps for curing prints? You're part of that crowd!
When using a UV LED lamp, make sure the lamp distance is around 10-15 cm from the print to prevent uneven curing. Adjust the curing time according to the resin type, but a general rule of thumb is 30-60 minutes.
Just remember to follow the manufacturer's guidelines to avoid under or over-curing, and you'll be rocking those smooth surfaces in no time!
Is It Necessary to Use a Specific Type of Sandpaper for Resin Print Finishing?
You're wondering if you need a specific type of sandpaper for resin print finishing. The answer is yes! When it comes to smoothening out those prints, you'll want to use sandpaper with varying abrasive materials and grades.
Start with coarser grits (around 120-150) to remove layer lines, then progress to finer grits (220-320) for a high-gloss finish.
Don't skip this step, or you'll be left with a rough, porous surface that's more eyesore than eye-candy!
Related Posts
-
Master Your Space With Digital Decluttering Tools
You're tired of feeling overwhelmed by digital clutter, wasting time searching for lost files, and struggling to focu...
-

Streamline Your Space: Decluttering Strategies for Minimalists
You're wasting time and energy maneuvering through cluttered spaces, which is why streamlining your space is essentia...

