
Create Custom Closet Shelves on a Budget
You can create personalized closet shelves on a budget by first evaluating your space needs, categorizing belongings, and identifying awkward areas for DIY solutions. Next, choose cost-effective materials like MDF, plywood, or reclaimed wood, ensuring they match your closet's aesthetic. Take accurate measurements, cut shelves precisely, and assemble them securely. Finally, maximize storage capacity by optimizing vertical space, utilizing corners, and incorporating space-saving solutions. By following these steps, you'll be well on your way to a clutter-free closet. Now, get ready to discover even more creative and practical solutions to elevate your closet organization to the next level.
Key Takeaways
• Assess your closet space needs by categorizing belongings, considering daily routines, and identifying awkward spaces for DIY storage solutions.
• Choose affordable shelf materials like MDF, plywood, or reclaimed wood that match your closet's aesthetic and can be easily customized.
• Take precise measurements of your closet dimensions and consider height, spacing, and weight capacity when cutting shelves.
• Assemble and install shelves securely with wall anchors and screws, ensuring they are level and evenly spaced.
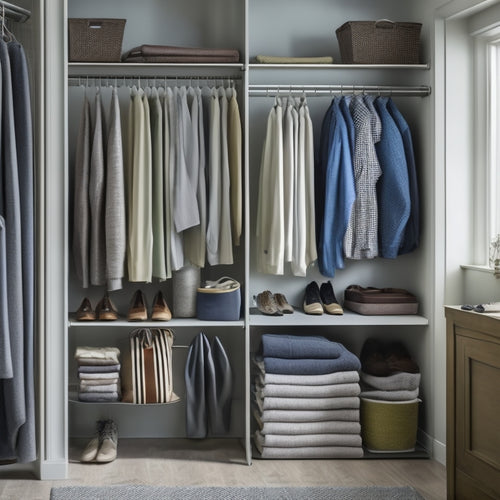
• Maximize storage capacity by optimizing vertical space, utilizing corners, and incorporating space-saving solutions like double rods or hanging organizers.
Assessing Closet Space Needs
Take stock of your closet's contents and habits to determine what you need to store and how you want to use the space, as this will dictate the type and number of shelves you'll require. This essential step in closet organization will help you maximize your space and create a functional area that meets your needs.
Start by categorizing your belongings into keep, donate, and discard piles to declutter your closet. Consider your daily routines and what you need easy access to. Identify any awkward spaces or corners that can be utilized with DIY storage solutions.
Next, think about the types of items you need to store, such as clothes, shoes, or accessories. Measure your closet's dimensions and visualize how you can use the space efficiently. Consider space-saving tips like using vertical space, installing shelves with adjustable heights, and utilizing baskets or bins to store small items.
Choosing Affordable Shelf Materials
What's the most budget-friendly way to get the shelving you need without sacrificing style or functionality?
When it comes to choosing affordable shelf materials, you've got options. For a sleek, modern look, consider using medium-density fiberboard (MDF) or plywood. Both are budget-friendly alternatives to solid wood and can be easily painted or stained to match your closet's aesthetic.
If you're looking for a more rustic vibe, reclaimed or repurposed wood can add a unique touch to your shelves. You can often find these materials at a lower cost than new lumber, and they can add a lot of character to your closet.
Another shelf material option is adjustable shelving systems, which usually come with their own hardware and can be installed easily. These systems are often made from affordable materials like aluminum or steel and can be customized to fit your closet's specific needs.
Measuring and Cutting Shelves
With your shelf material in hand, now it's time to measure and cut your shelves to fit your closet's distinctive dimensions, ensuring a snug and functional fit. Take precise measurements of your closet's width, depth, and any obstructions, like plumbing or electrical outlets. Use a tape measure and calculator to determine the best shelf size and layout for your closet organization system.
Consider the height and spacing of your DIY shelf brackets, as well as the weight capacity you need. Cut your shelves using a circular saw or hand saw, depending on the type of material you're working with. Sand the cut edges to smooth them out and remove any splinters. If you're using melamine or MDF, apply edge banding to cover the raw edges and give your shelves a finished look.
Double-check your measurements and make any necessary adjustments before moving on to the next step. Remember, accurate measuring and cutting are vital to a successful DIY closet organization project.
Assembling and Installing Shelves
You're ready to bring your custom closet shelves to life by assembling and installing them, carefully following the plan you've crafted to guarantee a sturdy and functional storage space. This is the fun part – seeing your design come together!
Before you start, make sure you have the necessary tools needed, including a drill, level, tape measure, and wall anchors.
Now, let's get started:
-
Shelf placement and spacing: Refer to your plan to determine the ideal shelf placement and spacing for your closet. Mark the wall with a pencil to guide your installation.
-
Assemble shelves: Use your drill to attach the shelf brackets to the shelves, following the manufacturer's instructions.
-
Install shelves: Hold the shelves in place against the wall, ensuring they're level, and mark the screw holes. Drill pilot holes and install the wall anchors and screws.
- Final check: Double-check that the shelves are level, secure, and evenly spaced before adding your closet contents.
Maximizing Storage Capacity
Now that your custom closet shelves are securely in place, it's time to think creatively about maximizing storage capacity by making the most of every available inch. You've got the foundation, now it's time to optimize it.
Vertical organization is key to unleashing your closet's full potential. Consider adding stackable bins, baskets, or shelves to make the most of your closet's vertical space. This will help keep items off the floor, reducing clutter and making it easier to find what you need.
Don't forget to utilize those often-wasted corners! Installing corner shelves or carousels can help you make the most of this typically dead space. By maximizing depth, you can fit more items in a smaller area, keeping your closet feeling spacious and organized.
Look for space-saving solutions like double rods, hanging organizers, or shelves with built-in drawers to really get the most out of your closet. With a little creativity, you can turn your closet into a storage powerhouse, all while staying within your budget.
Frequently Asked Questions
Can I Use Reclaimed or Repurposed Wood for Custom Closet Shelves?
"You can definitely use reclaimed wood for custom closet shelves, and it's a budget-friendly option too! Repurposed materials offer creative solutions, adding a unique touch to your space while reducing waste and saving you cash."
How Do I Handle Uneven or Sloping Closet Walls?
You're faced with a wonky closet wall, where straight lines are a distant dream. Don't let it get in the way! Use wall anchors and the shim technique to level your shelves, or opt for adjustable brackets and floating shelves to adapt to the slope.
Are Custom Closet Shelves a Good DIY Project for Beginners?
You're wondering if custom closet shelves are a good DIY project for beginners? Absolutely! With the right tools needed, a step-by-step guide, and some patience, you'll be creating a stylish storage space in no time.
Can I Add Lighting to My Custom Closet Shelves?
"Did you know 60% of homeowners consider lighting a top priority in closet design? You can add lighting to your custom closet shelves by exploring cost-effective solutions like battery-operated strips or installing LED lights, considering electrical considerations and local building codes."
How Do I Clean and Maintain Custom Closet Shelves?
You'll keep your custom closet shelves looking great by establishing a maintenance schedule, using gentle cleaning products on shelf materials, and implementing shelf organization tips, like storing items in bins and baskets.
Related Posts
-
Smart Storage for Small Kitchen Appliances
You can optimize your small kitchen's functionality by implementing smart storage solutions that efficiently stash sm...
-
Why Double Rods Are Key to Small Closet Organization
By installing double rods, you can instantly double your storage capacity and open up a more organized, clutter-free ...
-

Streamline Your Space: Decluttering Strategies for Minimalists
You're wasting time and energy maneuvering through cluttered spaces, which is why streamlining your space is essentia...


