Efficiently Organize Your Craft Room Space
Share
I've transformed my craft room into a dream workspace by focusing on inspirational decor, allocating dedicated spaces for equipment, and streamlining my workflow. To do the same, I categorize and group similar supplies, label them for easy access, and implement regular cleaning routines. By prioritizing equipment placement and utilizing rolling carts, I've maximized storage and reduced interruptions. Now, I can focus on what matters most – creating! With these strategies in place, I'm excited to share more tips and tricks to help you turn your craft room into a productivity powerhouse – let's get started!
Key Takeaways
• Allocate dedicated spaces for equipment and supplies to maintain a clutter-free craft room and optimize workflow.
• Utilize rolling carts and clear containers to store and organize supplies, ensuring easy access and visibility.
• Create a functional layout that prioritizes frequently used tools and equipment, reducing interruptions and increasing efficiency.
• Implement regular cleaning and maintenance routines to keep the craft room organized and ensure supplies remain accessible.
• Designate specific zones for tasks and categorize supplies to streamline workflow, reduce distractions, and increase productivity.
Designing a Creative Sanctuary
As I step into my craft room, I want to be enveloped in a space that sparks my imagination and fuels my creativity. To achieve this, I focus on inspirational decor and clever color schemes that stimulate my artistic side.
I choose vibrant hues that energize me, like bright coral and sunny yellow, and balance them with soothing neutrals to prevent overwhelm. To create a creative ambiance, I set up artistic displays that showcase my favorite projects and supplies.
Colorful ink jars and well-stocked shelves become visually appealing focal points that motivate me to create. By intentionally designing my space, I cultivate an atmosphere that inspires me to dream big and make something amazing.
Functional Layout Essentials
I allocate dedicated spaces for each piece of equipment in my craft room to guarantee a smooth project flow. I start with my screen printing press, which I mount on a rolling cart for easy access and convenience.
This space optimization strategy allows me to work efficiently, without wasting time searching for misplaced tools. I also prioritize equipment placement, ensuring that frequently used machines, like my Cricut BrightPad, are within arm's reach and plugged in.
Streamlining Your Workflow
By immersing myself in my projects without interruptions, I can greatly reduce the time spent searching for materials during projects. This workflow optimization trick helps me maintain a smooth creative flow, allowing me to focus on the fun part – making!
A well-designed workspace layout is essential for project efficiency. I've learned to allocate dedicated zones for specific tasks, ensuring that everything I need is within arm's reach. This setup enables me to work smarter, not harder. With my supplies organized and easily accessible, I can engage in my projects without interruptions, making the most of my crafting time.
Mastering Supply Organization
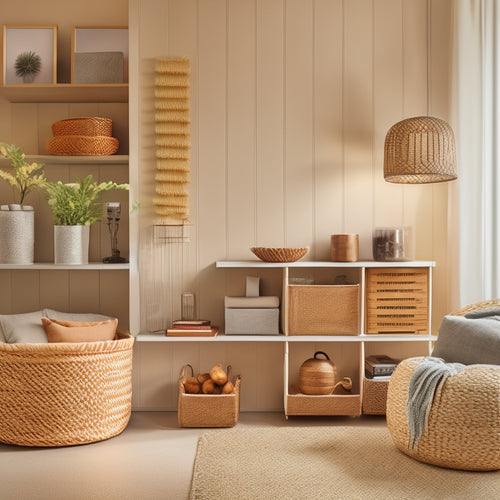
Mastering supply organization begins with categorizing and grouping similar items together, making it easy to locate specific supplies when needed. I've found that categorizing my supplies into sub-groups, like paper crafting or sewing, helps me quickly find what I need.
Labeling each category and subgroup is also a game-changer - no more digging through bins or wasting precious crafting time searching for that one specific supply! By optimizing my space, I've made sure everything is easily accessible, so I can focus on creating instead of searching.
With supply categorization and labeling, I've transformed my craft room into a haven of efficiency and productivity. Now, I can finally focus on making those DIY projects I've been dreaming of!
Storage and Maintenance Tips
To maintain a well-organized craft room, it's essential to implement a regular cleaning and maintenance routine, ensuring that supplies are consistently stored in their designated spaces and that clutter doesn't build up over time.
I swear by clear containerization - it's a game-changer! Not only do clear bins and containers keep my supplies visible, but they also make it easy to find what I need in a flash.
Labeling tips are also vital; I label everything from my ink pads to my washi tape, so I can grab what I need in an instant.
Rolling cart solutions are also a must-have for me - they provide portable storage and make it easy to move supplies around the room as needed.
With these maintenance strategies in place, I can focus on what really matters: creating!
Frequently Asked Questions
How Do I Prevent Clutter From Building up in My Craft Room?
I'm guilty of letting clutter creep into my craft room, but I've learned to stay on top of it! To prevent clutter from building up, I've developed good craft habits like putting things back in their place after each project.
My storage systems are key - clear bins, labeled shelves, and a pegboard for my tools keep everything organized and visible.
Regular tidying sessions keep my space functional and stress-free. Now, if only my desk could stay clutter-free for more than a day!
What Are Some Space-Saving Ideas for Small Craft Rooms?
'Clutter, the crafty nemesis! To tame it in my tiny craft room, I swear by foldable shelves that pop up like magic, providing extra storage without eating up floor space.
Hanging organizers are my BFFs too - they keep my supplies tidy and within reach, like a trusty sidekick. By utilizing these space-saving wonders, I can focus on creating, not digging through a mess.
Now, if you'll excuse me, I've a DIY project to conquer!'
Can I Use a Craft Room for Multiple Types of Crafts?
Can I use a craft room for multiple types of crafts? Absolutely!
I love that I can switch between painting, sewing, and paper crafting in one space.
I set up craft stations for each type, and it's amazing how hybrid projects emerge when I'm surrounded by diverse supplies.
I'll whip up a mixed-media art piece or sew a custom bag with a printed design.
The possibilities are endless, and my creativity thrives in this multi-craft sanctuary!
How Often Should I Purge My Craft Room of Unused Supplies?
The age-old struggle: when to purge my craft room of unused supplies. I confess, I've held onto dusty stamps for years, plagued by supply guilt.
But, I've learned to schedule a seasonal refresh every 3-4 months. It's liberating to let go of the unused and make room for new goodies!
I sort supplies into 'keep,' 'donate,' and 'toss' piles, and voilà – my space is refreshed, and I'm ready to create again.
Are There Any Ergonomic Considerations for Craft Room Design?
'Who needs a social life when you can spend hours hunched over a craft project? Not me, that's for sure!
But seriously, as a crafty enthusiast, I've learned that ergonomic considerations are essential. I prioritize proper posture and comfortable workstations to avoid chronic back and neck pain.
Related Posts
-

Simplify Your Space: Downsizing Tips for Seniors
You're ready to simplify your space and create a more peaceful living environment. Start by gathering boxes, bins, an...
-

Effortless Home Organization Systems for Busy Families
You can create an effortless home organization system that caters to your busy family's unique needs and routines. St...
-

Declutter Your Desk With These Online Tutorials
You're just one organized desk away from boosting your productivity, reducing stress, and achieving a sense of contro...


