
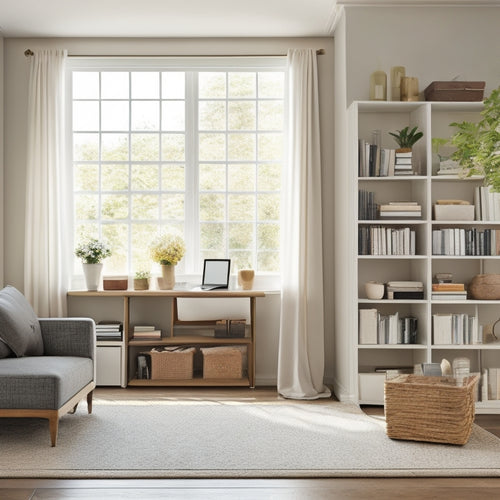
Revamp Your Cube Storage With Style
Elevate your cube storage with a thoughtful design vision that harmoniously blends form and function. A clear vision lays the foundation for a cohesive and functional space, guiding every step of the transformation. To achieve a polished look, assemble a thorough supply list, accurately cut wood pieces, and master a uniform stain finish. Securely attach the wood pieces, and consider adding decorative hardware for visual appeal. As you bring all the elements together, the possibilities for creating a stylish and organized space become endless, and the next step in your design journey reveals itself.
Key Takeaways
• Start with a clear design vision to create a cohesive and functional storage space that reflects your personal style.
• Assemble a thorough supply list tailored to your project to ensure you have all the necessary materials beforehand.
• Cut wood pieces with precision using accurate measurements and the right tools to achieve a uniform look.
• Achieve a rich, uniform stain finish by applying high-quality stain in thin coats and allowing each coat to dry.
• Securely attach wood pieces together using a high-quality adhesive and decorative hardware for added visual appeal.
Designing With a Clear Vision
When revamping your cube storage, starting with a clear design vision is essential, as it lays the foundation for a cohesive and functional space that reflects your personal style.
This vision serves as a guiding force, ensuring that every element, from the wood pieces to the handles, works harmoniously together.
To achieve this, tap into your creative inspiration and brainstorm room transformations that resonate with your desired theme.
Effective experimentation is key, so don't be afraid to try out new ideas and adjust them as needed.
Essential Supply List for Success
To guarantee a seamless cube storage makeover, it's critical to assemble a thorough supply list tailored to the specific number of bins you're revamping. This list should include materials such as wood boards, stain, glue, and handles or knobs.
Having all necessary components beforehand streamlines the process, ensuring a cohesive design that aligns with current interior design trends. Effective storage organization relies on attention to detail, so take your time to brainstorm and experiment with ideas.
A well-planned supply list is vital to achieving a polished, professional look that complements your space. By prioritizing this important step, you'll set yourself up for success and create a stunning cube storage system that enhances your room's aesthetic appeal.
Cutting Wood Pieces With Precision
With a well-planned supply list in hand, the next essential step in revamping your cube storage is to accurately cut the wood pieces that will transform the plain bins into a stylish storage system.
To guarantee precision, employ woodworking techniques that prioritize measurement accuracy. Select the right tools for the task, such as a miter saw or circular saw, and take necessary safety precautions to avoid accidents.
When cutting multiple wood pieces, use a stopper to maintain consistent sizing and simplify the process. By taking your time and focusing on precise measurements, you'll achieve a uniform look that elevates your cube storage makeover.
Achieving a Uniform Stain Finish
Accurate cutting of wood pieces sets the stage for a polished makeover, and now it's time to focus on imbuing the wood with a rich, uniform stain finish that complements the cube storage bins. Achieving uniformity requires attention to detail and patience. To guarantee a flawless finish, it is imperative to use high-quality stain and adhere to the manufacturer's instructions.
| Staining Techniques | Tips for Uniformity |
|---|---|
| Apply stain in thin coats | Allow each coat to dry before applying the next |
| Use a clean, lint-free cloth | Avoid streaks and blotches by wiping in one direction |
| Stain both sides of the wood | Ensure a consistent finish and prevent warping |
| Allow sufficient drying time | Follow the manufacturer's recommended drying time for a professional finish |
Securely Attaching Wood Pieces Together
By carefully orchestrating the gluing process, you can create a sturdy bond between the wood pieces, ensuring a seamless integration with the cube storage bins.
To achieve strong adhesion, start by applying glue strategically to avoid seepage. Use a high-quality adhesive that dries clear to maintain the wood's aesthetic appeal. Allow adequate drying time before handling the bins, ensuring the wood pieces are securely attached.
For added visual appeal, consider incorporating decorative hardware, such as metallic accents or ornate fasteners, to create a cohesive design.
Adding Functional Handles With Flair
Elevating the functionality of your cube storage makeover, attaching handles with flair adds a touch of sophistication to the overall design.
When it comes to handle selection, consider finishes that complement your cube storage's aesthetic, such as brass, silver, or wooden handles.
Installation techniques involve applying glue strategically to guarantee a secure bond.
For a cohesive look, customize the finishes by matching the handles to the stain or color scheme of your wood pieces.
Creative solutions can also be achieved by incorporating unique handle shapes or sizes to add visual interest.
Putting It All Together With Confidence
With each component meticulously crafted and assembled, the cube storage makeover begins to take shape, exuding a sense of sophistication and refinement that elevates the entire room.
As the project gains momentum, the design challenges that once seemed challenging are now overcome, giving way to a cohesive and harmonious space.
The carefully selected materials, precise measurements, and attention to detail all come together to create a beautiful and functional storage solution.
With each step, confidence grows, and the transformation becomes a proof of the power of creativity and perseverance.
As the final pieces fall into place, the result is a stunning cube storage system that not only solves a practical problem but also becomes a design statement, imbuing the space with a sense of belonging and sophistication.
Frequently Asked Questions
Can I Use a Different Type of Wood for This DIY Project?
When exploring wood options for your DIY project, consider the unique grain patterns and textures of different woods, such as oak, pine, or walnut, to create a visually appealing and cohesive design that reflects your personal style.
How Do I Prevent the Wood Stain From Getting Too Dark?
To prevent wood stain from getting too dark, conduct thorough stain testing on inconspicuous areas, and employ color balancing techniques, such as adding a lighter stain or using a stain conditioner, to achieve a harmonious, bespoke finish.
Are There Any Alternative Adhesives to Super Glue?
When seeking alternative adhesives to super glue, consider epoxy alternatives for exceptional bonding strength and versatility, or hot melt options for a fast and durable bond, ensuring a secure and stylish attachment of handles to your wooden cube storage makeover.
Can I Attach the Handles With Screws Instead of Glue?
The age-old debate: glue or screw? In this case, screws can be a superior choice, allowing for effortless handle placement and adjustable tension. Just guarantee precise screw length calculation to avoid splitting the wood, and voilà!
How Do I Clean and Maintain the Wood Pieces Over Time?
To guarantee the longevity of your wooden cube storage, adopt a regular cleaning routine, focusing on dust prevention and wood polishing to maintain the rich finish, thereby preserving the aesthetic appeal and functionality of the storage solution.
Related Posts
-
10 Essential Skills for Mastering Home Organization
You're ready to take control of your space and transform it into a haven of calm and productivity. Mastering home org...
-

Transform Your Space: 5 Online Courses to Help
Ready to transform your space from cluttered to calm? Start with mastering home organization fundamentals, like declu...
-

Declutter Your Desk With These Online Tutorials
You're just one organized desk away from boosting your productivity, reducing stress, and achieving a sense of contro...


