
Revamp Your Garage With DIY Pegboard Wall
I'm revamping my garage with a DIY pegboard wall, a cost-effective solution that's under $200 and maximizes storage space without sacrificing style. To get started, I'll need standard 4 x 8 pegboard panels, 1 x 6 and 1 x 2 boards, and essential tools like a drill and tape measure. I'll design the wall for function and flexibility, incorporating 1 x 2s for easy peg insertion and a shelf for extra storage. With endless customization options, I'll reflect my personal style and specific needs, choosing the perfect pegboard hooks and accessories for a cohesive look. Now, let's get to the nitty-gritty details of bringing this project to life!
Key Takeaways
• Create a cost-effective garage revamp under $200 using a pegboard wall for maximum storage and customization.
• Design a functional and flexible pegboard wall with 1 x 2s for easy peg insertion and a shelf for extra storage.
• Gather necessary materials like pegboard panels, 1 x 6 and 1 x 2 boards, caulk, paint, and primer for a smooth finish.
• Customize your pegboard wall with perfect pegboard hooks and accessories that reflect your personal style and specific needs.
• Ensure a professional finish by priming the entire surface, using a spray painter, and avoiding paint in holes.
Project Overview and Construction
I'm tackling a DIY project to revamp my garage with a pegboard wall, a cost-effective solution that utilizes basic materials and can be completed for under $200.
This space-saving solution is perfect for maximizing storage in my garage. By using 1 x 6 white pine for the frame and 1 x 2 for the base setup, I'm able to create a sturdy structure for my pegboard panels.
The project customization options are endless, allowing for creative adaptations to fit my specific needs. With a little creativity, I can transform my garage into a well-organized space that's both functional and visually appealing.
This DIY project is a great example of a cost-effective alternative to expensive garage organization systems.
Designing for Function and Flexibility
To guarantee my pegboard wall is both functional and flexible, I've incorporated a design that includes 1 x 2s behind the pegboard panels for easy peg insertion. I've also added a shelf at the top for extra storage. This allows me to customize my organization solutions and optimize the space to fit my specific needs.
I can easily rearrange the pegs and hooks to accommodate different tools and accessories, making it a versatile and practical solution for my garage. The shelf provides additional storage for items that don't require hooks, keeping my garage organized and clutter-free.
Materials and Tools You'll Need
I'll need a variety of materials and tools to bring this DIY pegboard wall project to life, including standard 4 x 8 pegboard panels, 1 x 6 and 1 x 2 boards, caulk, paint, and primer. To guarantee a smooth installation, I'll also need essential tools like a drill, level, and tape measure. For a professional finish, I'll consider cost-effective alternatives, such as spray painting, and explore different paint color options to match my garage's aesthetic. Additionally, I'll need various storage solutions, like bins and baskets, to maximize my pegboard's potential.
| Materials | Tools | Notes |
|---|---|---|
| 4 x 8 pegboard panels | Drill | Essential for installation |
| 1 x 6 boards | Level | Ensure precise alignment |
| 1 x 2 boards | Tape measure | Accurate dimensions |
| Caulk | Paintbrushes | Smooth application |
| Paint | Primer | Prepare the surface |
Tips and Tricks for a Smooth Finish
Before diving into the painting process, make sure to prime the entire surface with a coat of primer to secure a smooth, even finish. This vital step guarantees that your paint adheres well and dries evenly.
When it comes to painting techniques, I recommend using a spray painter for a cleaner look and to avoid getting paint stuck in holes. For an added professional touch, use a roller extension pole to reach those hard-to-reach areas.
Customizing Your Pegboard Wall
With my pegboard wall now complete, it's time to add the finishing touches by selecting the perfect pegboard hooks and accessories to customize my storage space.
I'm excited to create a space that reflects my personal style and meets my specific needs.
I'll start by choosing custom hooks that fit my tools and gadgets, ensuring a snug and secure fit.
Next, I'll add personal touches like baskets and bins to store small items, keeping them organized and out of the way.
I'll also experiment with creative arrangements, grouping similar items together to create a sense of cohesion.
With a little creativity and some smart organization ideas, my pegboard wall will become a functional work of art that makes my garage a more efficient and enjoyable space.
Frequently Asked Questions
Can I Use a Different Type of Wood for the Frame and Shelves?
"I can definitely experiment with wood alternatives for the frame and shelves, like cedar or reclaimed wood, to create a custom design that fits my style and preferences."
How Do I Prevent the Pegboard From Warping Over Time?
To prevent pegboard warping, I guarantee moisture protection by applying a waterproof coating and sealing gaps with caulk, which boosts pegboard longevity; I also consider wood alternatives like MDF or plywood for added durability.
Are There Any Specific Safety Precautions I Should Take During Installation?
When installing my DIY pegboard wall, I take safety precautions by wearing gloves, safety glasses, and a dust mask, and guarantee a stable ladder, proper tool handling, and a well-ventilated workspace.
Can I Add a Lock or Secure Storage to the Pegboard System?
I can definitely add secure storage to my pegboard system; I'll use lockable hooks and storage boxes to keep valuable items safe, and explore other pegboard organization solutions for maximum security and efficiency.
How Do I Clean and Maintain the Pegboard to Keep It Looking New?
"I maintain my pegboard's new look by wiping it down monthly with a damp cloth, vacuuming dust, and reorganizing hooks every 3 months; these simple cleaning tips keep my DIY pegboard project looking fresh and functional."
Related Posts
-
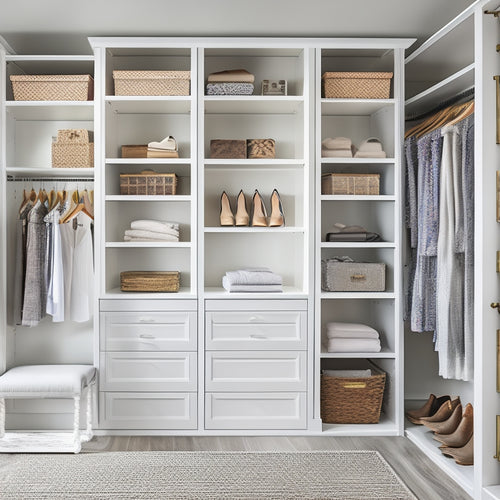
Maximizing Small Closets With Custom Shelving Solutions
You're tired of feeling like your small closet is cramped and cluttered, but with custom shelving solutions, you can ...
-
3 Best Online Courses for Home Organization Skills
You're just a few clicks away from a clutter-free home and a more efficient daily routine. Three online courses can h...

