Revamp Your Space With DIY Closet Organization
Share
Transform your closet into a serene oasis with a DIY organization makeover. Start with the essentials: Bullnose Particleboard, support pieces, and the right tools. Plan and measure your space carefully, ensuring sturdy and visually appealing builds. Add finishing touches with woven baskets, stackable drawers, and personalized accents. Take it to the next level with custom labels and decorative elements. From Cricut templates to vinyl tape, infuse your personality into every detail. As you reimagine your closet's potential, discover the secrets to creating a space that sparks joy and streamlines your daily routine, revealing a world of possibilities within.
Key Takeaways
• Start with a solid foundation by using Bullnose Particleboard for a modern look and stock up on essential materials.
• Measure your space accurately, maintaining 4-inch spacing between shelves and considering shelf thickness for a perfect fit.
• Build and install shelves securely onto support cleats, ensuring a level and sturdy structure that maximizes space optimization.
• Add personalized touches with decorative accents, stackable drawers, and hanging organizers to create a unique and visually appealing space.
• Incorporate effective labeling techniques, using tools like Cricut templates, to infuse personality and visual appeal into your DIY closet organization.
DIY Closet Shelving Essentials
Stocking up on the right materials is crucial to a successful DIY closet shelving project, and a thorough understanding of the necessary supplies is essential to getting started.
When it comes to shelving placement, consider design options that maximize space optimization. Bullnose Particleboard is a great material alternative for a sleek, modern look.
Don't forget to grab 12 support pieces, 2 Brad Nails, Primer, Paint, Caulk, and Wood Glue to guarantee a sturdy and visually appealing build.
With the right tools, such as a Brad Nailer, Level, and Miter Saw, you'll be well on your way to creating a functional and stylish closet space.
Planning and Measuring Space
When designing your DIY closet shelving, carefully measuring the space above your bins is essential to determining the best shelf placement, ensuring a harmonious balance between storage and accessibility. A well-planned closet layout is vital for ideal space optimization.
To get started, measure the space above your bins, keeping in mind the ideal 4-inch spacing between shelves. Mark the wall with tape or a pencil to visualize your design. Don't forget to add the shelf thickness to your measurements. Finally, determine the shelf spacing for each bin to create a functional and visually appealing closet.
- Measure space above bins
- Keep 4-inch spacing between shelves
- Mark wall with tape or pencil
- Add shelf thickness to measurements
Building and Installing Shelves
With shelves playing a crucial role in maximizing closet storage, precision cutting and assembly are essential to create a sturdy and functional shelving system. To guarantee a seamless installation, follow these key steps:
| Step | Description |
|---|---|
| Plan Shelves | Determine shelf spacing for each bin, keeping 4-inch gaps between shelves |
| Cut Support Cleats | Cut support pieces to wall length, installing into studs with brad nails |
| Assemble Shelves | Cut shelves to length, dry-fitting for a snug fit, and secure with wood glue and brad nails |
| Install Shelves | Place shelves onto support cleats, ensuring level and secure installation |
Adding Finishing Touches
Finishing touches elevate the entire closet organization system, transforming functional shelves into a visually appealing space that sparks joy and serenity. It's time to add the icing to your DIY closet organization cake!
-
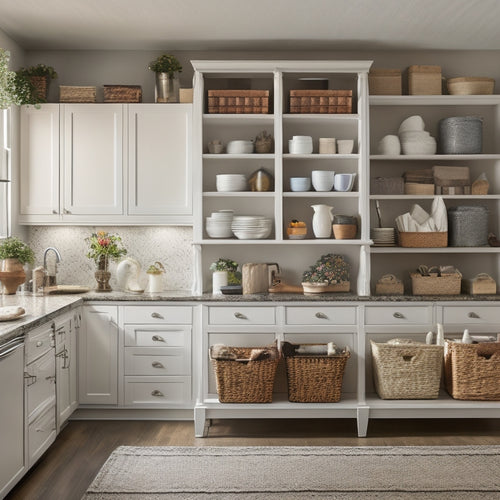
Add decorative accents like woven baskets or decorative bins to store items like socks and accessories, keeping them out of sight while maintaining a stylish look.
-
Incorporate storage solutions like stackable drawers or hanging organizers to maximize vertical space and keep clutter at bay.
-
Bring in personalized touches like monogrammed hooks or custom drawer pulls to make your closet feel truly unique.
- Finally, consider adding a few plants or a statement piece of art to create a peaceful ambiance and make your closet a haven.
Customizing With Labels and Decor
Now that the functional aspects of your DIY closet organization system are in place, it's time to infuse your space with personality and visual appeal through the strategic use of labels and decor. Effective labeling techniques can make a world of difference in maintaining your newly organized space.
Try using a Cricut template to customize font sizes and shapes, and add a touch of whimsy with decorative accents like colorful vinyl or patterned washi tape. For a cohesive look, choose a label style that complements your closet's aesthetic.
Don't be afraid to get creative and add a dash of humor to your labels – after all, who says organization can't be fun? By incorporating these decorative elements, you'll transform your closet from a utilitarian space to a reflection of your personal style.
Frequently Asked Questions
How Do I Adjust Shelf Height for Uneven Ceiling Spaces?
When dealing with uneven ceiling spaces, adjusting shelf height is essential for a seamless look. Ceiling considerations are vital in custom shelving. To tackle this challenge, measure the ceiling's highest and lowest points, then calculate the shelf's ideal position.
Use a level to guarantee straight lines and a pencil to mark the wall. Don't be afraid to get creative – uneven ceilings can lead to unique, visually appealing shelves that add character to your space!
Can I Use MDF Instead of Bullnose Particleboard for Shelving?
Building a DIY shelving system is like constructing a masterpiece - every detail matters.
When it comes to choosing the right material, MDF is a viable alternative to bullnose particleboard.
MDF offers impressive durability, resisting warping and cracking with ease.
Aesthetically, MDF provides a smooth, even surface, perfect for painting or staining.
While it may not be as budget-friendly, MDF's benefits make it a worthy investment for a sleek, long-lasting shelving system.
What Type of Paint Is Best for High-Traffic Closet Areas?
When it comes to painting high-traffic closet areas, durability and aesthetics are key. For a flawless finish, opt for a semi-gloss or satin paint that can withstand scuffs and scratches.
With a vast array of color options, choose a hue that complements your closet's style, from soft neutrals to bold statements. Consider finish choices like eggshell or high-gloss for added protection and visual appeal.
How Do I Secure Shelves to Plaster or Drywall Without Studs?
The age-old conundrum: securing shelves to plaster or drywall without studs. It's a DIY dilemma that has plagued many a brave builder.
But fear not, dear DIYer! The solution lies in the clever use of Wall Anchors, cleverly disguised as tiny superheroes, saving the day one shelf at a time.
Paired with sturdy Shelf Brackets, these dynamic duos will keep your shelves firmly in place, defying gravity and your landlord's worst fears.
Are There Any Alternative Materials for Support Cleats Besides Wood?
When it comes to securing shelves, traditional wood support cleats might not be the only game in town. Consider alternative materials like metal brackets, which offer industrial-strength stability and a sleek, modern aesthetic.
Or, for a more discreet approach, plastic anchors can provide a sturdy hold without marring the surface. Both options provide a reliable solution for shelves that need a little extra oomph, sans studs.
Related Posts
-

3 Essential Tips to Boost Home Storage Capacity
You're one step away from freeing yourself from clutter chaos! To boost your home storage capacity, start by purging ...
-

Master Your Space With Digital Decluttering Tools
You're tired of feeling overwhelmed by digital clutter, wasting time searching for lost files, and struggling to focu...

