TDA Design Maven's DIY Home Organization Guide
Share
I transformed my chaotic 57-inch long, 2-feet deep space into a serene and functional home organization hub. To achieve this, I customized the baseboards to match my shelving unit, creating a seamless look. I assembled the unit with precision, adding decorative trim for a polished finish. By maximizing space efficiency, I optimized the layout and created a clutter-free zone. I added finishing touches, like color-coordinated paint and textiles, to create a cohesive space. I designed the interior for maximum storage, with zones for specific items and adjustable shelves. Now, I'm ready to share the details that brought it all together.
Key Takeaways
• Customize your organizer unit to fit your space by adjusting dimensions and layout for maximum storage and efficiency.
• Ensure a seamless look by designing custom baseboards and trim to match your shelving unit and surrounding decor.
• Optimize your space by creating zones for specific items, using adjustable shelves and bins, and designating spots for everything.
• Add finishing touches with color-coordinated paint, decorative accents, and textiles to create a warm and inviting atmosphere.
• Follow a step-by-step process to assemble and install your organizer unit, paying attention to detail for a professional-looking finish.
Customizing for a Seamless Look
I removed the existing baseboards to create a custom base that would fit seamlessly with the Ikea shelving unit, ensuring a flush fit that would make the built-in organizer look like it was always meant to be there. This was essential in achieving an integrated design that blended with the surrounding space.
I designed the custom baseboards to match the height of the shelving unit, ensuring a sleek and cohesive look. By doing so, I avoided any awkward gaps or visual disruptions, creating a sense of belonging and harmony in the room.
The result was a beautiful, built-in organizer that looked like a natural extension of the space, rather than a separate entity.
Building the Organizer Unit
With the custom base in place, it's time to assemble the shelving unit, meticulously adhering to the Ikea instructions to guarantee a sturdy and level foundation for the organizer.
As I build the unit, I'm mindful of material sourcing and budget considerations, ensuring that every element is carefully chosen to fit within my $100 budget.
-
I select paint that complements the surrounding decor, applying a smooth finish to the shelves and backing.
-
I install hardware with precision, ensuring each piece is securely attached.
-
I carefully measure and cut the shelves to fit the space, maximizing storage capacity.
- I add decorative trim to conceal any gaps, creating a seamless look.
Maximizing Space Efficiency
Customizing the shelving unit's dimensions and layout allows for best use of the 57-inch long, 2-feet deep space, ensuring every inch is allocated for maximum storage efficiency. By optimizing the space, I was able to create a functional storage solution that meets my family's needs.
To achieve this, I focused on efficient layout and decluttering tips. I strategically placed shelves and compartments to accommodate different types of items, making it easy to access and maintain. By doing so, I was able to create a clutter-free zone that promotes a sense of belonging and calmness.
With space optimization and clever storage solutions, I've turned a chaotic area into a peaceful haven.
Adding the Finishing Touches
To complete the built-in home organizer, I added new baseboards and poplar boards to create a smooth connection between the unit and the surrounding wall. This attention to detail guaranteed a seamless shift from the custom-built organizer to the existing space.
To take it to the next level, I focused on color coordination and incorporated decorative accents to tie everything together. Here are some key considerations for adding those finishing touches:
- Choose a paint color that complements the surrounding walls and decor
- Select decorative hardware that matches the style of your home
- Add crown molding or other trim to create a cohesive look
- Incorporate textiles, such as baskets or bins, to add warmth and texture
Creating a Functional Space
I designed the interior of my built-in home organizer to maximize storage capacity while maintaining easy accessibility for my kids.
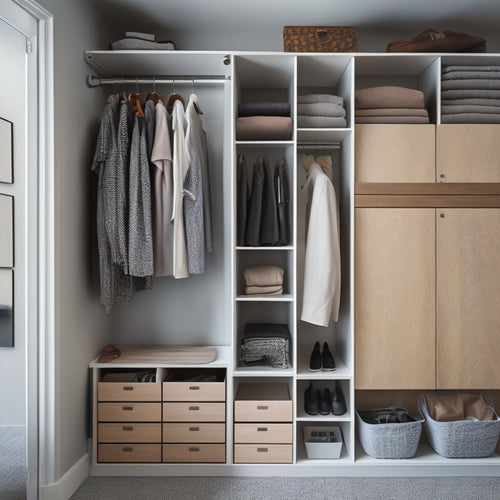
By creating zones for specific items, such as toys, books, and craft supplies, I guaranteed that everything has a designated spot, making it easier for my kids to find what they need and put things back in their place.
This decluttering solution has been a game-changer for our household.
I also made sure to incorporate adjustable shelves and bins to accommodate changing needs and ages.
With this functional space, my kids can easily grab what they need, and I can breathe a sigh of relief knowing that our home is organized and clutter-free.
Frequently Asked Questions
How Do I Measure Accurately for a Custom-Built Organizer Unit?
When constructing a custom organizer unit, I guarantee accurate measurements by avoiding common mistakes, like miscalculating corners, and using shortcuts like marking walls with painter's tape to visualize the space before installing.
Can I Use a Different Type of Wood for the Backing and Molding?
"As I envision my dream organizer unit, I wonder, can I mix and match wood varieties to achieve my unique aesthetic? Absolutely, I can choose backing and molding woods that complement each other, reflecting my personal style and preferences."
What Kind of Screws and Brackets Are Best for Securing the Unit?
'When securing my custom shelving unit, I choose screws with a high load capacity to guarantee stability and rust-resistant brackets to withstand moisture, ensuring a durable and long-lasting installation that exudes confidence.'
How Do I Stain the Pine Board to Match My Home's Existing Trim?
When staining my pine board, I test various wood tones and stain options on a scrap piece to find the perfect match for my home's existing trim, ensuring a seamless blend of old and new.
Are There Any Specific Safety Considerations for Installing an Organizer Unit?
As I start on this installation journey, I prioritize safety above all, ensuring I don't get 'wired' about electrical considerations and respect weight limits to avoid a 'heavy' mistake that could have devastating consequences.
Related Posts
-

7 Best Compact Closet Storage Ideas for Tiny Homes
You're looking for compact closet storage ideas to maximize your tiny home's space. Start by doubling your hanging sp...
-

Top Digital Tools for Home Decor Organization
You're looking to take your home decor organization to the next level with the right digital tools. From cloud storag...

