
What DIY Storage Hacks Will Boost Productivity?
You can greatly enhance your productivity by incorporating clever DIY storage hacks into your workspace, allowing you to focus on tasks instead of wasting time searching for misplaced items or dealing with clutter. Start by decluttering your workspace, sorting items into keep, donate, and discard categories, and investing in portable containers for storage. Maximize vertical space by installing shelves, hooks, and baskets, and repurpose old furniture into unique storage solutions. With these DIY hacks, you'll be well on your way to a more organized and efficient workspace - and that's just the beginning of what you can achieve.
Key Takeaways
• Maximize vertical storage space with shelves, hooks, and baskets to keep frequently used items within easy reach and reduce clutter.
• Create a pegboard system with labeled sections and accessories to streamline organization and optimize tool and equipment storage.
• Utilize hidden storage areas like under the bed, behind mirrors, or in hollowed-out books to store daily essentials discreetly.
• Implement a 'one in, one out' policy to prevent clutter and maintain a organized workspace.
• Repurpose old furniture into unique storage solutions to cater to specific needs and add a touch of creativity to your workspace.
Decluttering Your Workspace Effectively
Decluttering Your Workspace Effectively
Start by tackling the piles of paperwork, scattered notes, and unnecessary items that are suffocating your workspace, and sort them into three essential categories: keep, donate/recycle, and discard. Be ruthless – if you don't need it, get rid of it. This will help you achieve a minimalist desk, free from distractions and clutter.
Next, invest in portable containers to store the items you've decided to keep. Label each container so you can easily find what you need. This will help you stay organized and focused. Consider using small bins or baskets to store office supplies, papers to file, and other items that tend to clutter your workspace.
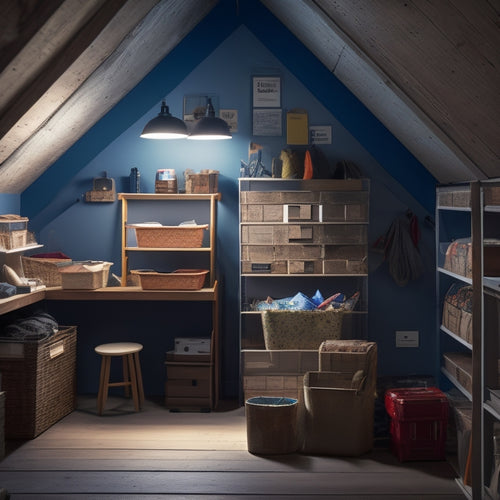
Maximizing Vertical Storage Space
Now that your workspace is decluttered, turn your attention to the walls and ceilings, where you can install shelves, hooks, and baskets to maximize your vertical storage space and keep frequently used items within easy reach. This will help you make the most of your available space and reduce clutter on your work surface.
Consider installing floating shelves to store books, binders, or office supplies. These shelves are easy to install and can be placed at any height, making them perfect for storing items of varying sizes.
Don't forget about the space on the back of your door! Over the door storage racks and hooks can hold everything from bags and jackets to cleaning supplies and office equipment. You can also use adhesive hooks or a pegboard to hang items like headphones, cords, or accessories.
Repurposing Old Furniture Creatively
By repurposing old furniture, you can breathe new life into discarded pieces and create unique storage solutions that not only save you money but also add a touch of personality to your workspace. This approach allows you to think outside the box and come up with creative ideas that cater to your specific needs.
For instance, an old dresser can be transformed into a storage unit for your office supplies, while a vintage ladder can become a bookshelf or a display rack for your favorite decorative items.
Here are some furniture repurposing ideas to get you started:
- Turn an old coffee table into a desk with built-in storage for your paperwork and office essentials.
- Convert a vintage window into a room divider with built-in shelves for storing books, files, or office supplies.
- Use an old trunk as a storage ottoman or a coffee table with hidden storage.
- Transform an old bookshelf into a room divider or a display rack for your favorite decorative items.
Building Custom Shelving Units
When building custom shelving units, you'll want to start by considering the essentials of shelving design. This includes the type of materials you'll use and the overall aesthetic you're going for. As you plan your project, think about how you can maximize vertical space to make the most of your storage needs.
With a solid design in place, you can explore customization options that fit your unique needs and style.
Shelving Design Essentials
You'll likely need to ponder three key factors - purpose, space, and style - as you start designing your custom shelving unit to guarantee it meets your specific storage needs and fits seamlessly into your room's aesthetic. This will secure your DIY project is both functional and visually appealing.
When considering purpose, think about what you'll be storing and how often you'll need to access those items. This will help you determine the type of shelving material options and space saving solutions you'll need. For instance, if you're storing heavy objects, you may want to opt for sturdy wood or metal shelves.
Here are some additional shelving design essentials to keep in mind:
-
Color coordination: Choose a color scheme that complements your room's decor to create a cohesive look.
-
Shelving material options: Consider wood, metal, glass, or a combination of materials to suit your needs and style.
-
Space constraints: Measure your space carefully to secure your shelving unit fits comfortably and consider vertical space saving solutions.
- DIY project planning: Plan your project carefully, including budget, timeline, and necessary tools, to secure a smooth and successful build.
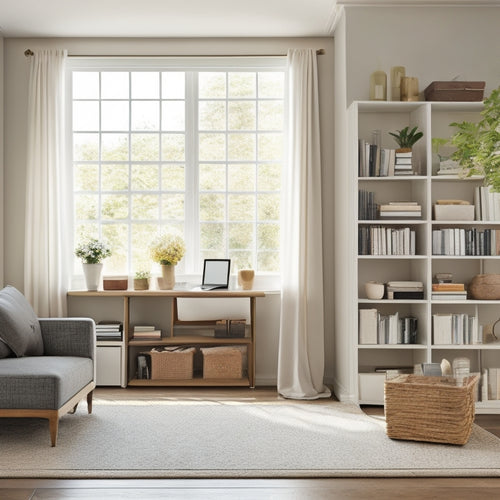
Maximizing Vertical Space
Building custom shelving units that enhance vertical space allows you to make the most of your room's dimensions, creating a sense of airiness while keeping your belongings organized and within reach. By doing so, you'll be able to store more items without sacrificing floor space. Consider installing floor-to-ceiling shelves that can hold heavy loads, making the most of your walls' vertical real estate.
You can also utilize wall-mounted storage solutions like hanging planters or wall-mounted baskets to store smaller items, keeping them off the floor and out of the way. These additions won't only add storage but also create a visually appealing display.
When designing your custom shelving unit, think about the items you need to store and how you can categorize them. This will help you determine the best shelf layout and size. By maximizing your vertical space, you'll be able to create a more organized, clutter-free environment that boosts your productivity.
Customization Options
Customization Options
How do you plan to tailor your custom shelving unit to your unique storage needs and personal style? With endless possibilities, you can create a system that not only maximizes space but also reflects your individuality.
Here are some ways to customize your shelving unit:
-
Color coding and labeling: Organize items by category or frequency of use and label them accordingly. This will help you quickly identify what you need and where it's stored.
-
Decorative containers and dividers: Add a touch of personality with decorative bins, baskets, or boxes to store items like office supplies, craft materials, or personal items. Dividers can also help separate items within a shelf.
-
Adjustable shelves: Install shelves that can be adjusted to accommodate items of varying sizes, ensuring efficient use of space.
- Incorporating hooks and baskets: Add hooks for hanging items like bags, accessories, or tools, and baskets for storing small items like paper clips or pushpins.
Utilizing Hidden Storage Areas
Explore the often-overlooked nooks and crannies in your home, where creativity can turn empty spaces into functional storage areas that keep clutter at bay. You'll be surprised at how many secret compartments and hidden spaces can be found with a little bit of innovative thinking.
| Hidden Space | Storage Solution | Benefits |
| Under Bed | Storage bins or drawers | Out-of-sight storage for linens, out-of-season clothes |
| Hollowed-out Books | Secret compartments | Discreet storage for valuable items, like jewelry or important documents |
| Behind a Mirror | Sliding storage panel | Convenient storage for daily essentials, like skincare products or jewelry |
Organizing Small Parts Efficiently
Efficiency is key when it comes to organizing small parts, and by implementing a few clever strategies, you can tame the chaos of tiny components and find what you need in a snap. To get started, consider using drawer dividers to compartmentalize your storage spaces. This will help you separate similar parts and prevent them from getting jumbled together.
You can also create a labeling system to identify what's inside each compartment, making it easy to locate specific items.
Here are some additional tips to help you organize small parts efficiently:
- Use stackable bins to store small parts, such as screws, nuts, and bolts. These bins can be easily labeled and are compact enough to fit on a shelf or in a corner.
- Utilize hanging organizers, like over-the-door storage racks or hanging bins, to maximize vertical space and keep frequently used items within easy reach.
- Designate a specific area for small parts storage to prevent them from getting scattered throughout your workspace.
- Implement a 'one in, one out' policy to prevent clutter from building up over time.
Creating a Pegboard System
How can you create a pegboard system that streamlines your storage and keeps your workspace organized?
Start by selecting a pegboard that fits your space and needs. You can choose from various sizes, materials, and configurations.
Next, plan the layout of your pegboard by grouping similar items together, such as paint organization and tool storage. Consider the frequency of use and accessibility when deciding where to place each item.
Install hooks, bins, and other accessories to maximize storage capacity. Use bins to store small items like nuts and bolts, while hooks can hold tools, cables, and other equipment.
Label each section to ensure easy identification and retrieval. You can also add a shelf or cabinet below the pegboard to store larger items or less frequently used tools.
Frequently Asked Questions
How Often Should I Reorganize My DIY Storage Systems for Optimal Productivity?
You should reorganize your DIY storage systems every 2-3 months to maintain peak productivity, as it helps you refine your storage frequency, maximize organization efficiency, and adapt your workspace layout to evolving time management needs.
Can DIY Storage Hacks Be Adapted for People With Mobility Impairments?
You wonder if DIY storage hacks can be adapted for people with mobility impairments, and the answer is yes! By incorporating accessibility features and mobility solutions, you can create customized storage systems that cater to individual needs.
Are DIY Storage Hacks Suitable for Small or Shared Workspaces?
In small or shared workspaces, you'll need space-saving solutions that foster collaborative organization. Create personalized compartments for each team member, ensuring efficient utilization of available space, and maximizing productivity in tight quarters.
How Do I Balance Aesthetics With Functionality in DIY Storage Solutions?
Imagine your dream workspace, where style and efficiency blend seamlessly. You achieve this balance by prioritizing accessibility in your design, ensuring that form and function coexist harmoniously, and making conscious style vs. efficiency trade-offs.
Can DIY Storage Hacks Be Used in Non-Traditional Workspaces Like Outdoor Offices?
You can repurpose outdoor spaces like patios, decks, or gardens into functional workspaces by implementing outdoor organization systems, such as weather-resistant shelving, hooks, and bins, to create unconventional yet productive offices.
Related Posts
-
Unlock Attic Storage Potential With Online Guides
You're sitting on a treasure trove of storage space, right above your head! Reveal your attic's hidden potential by a...
-
10 Essential Skills for Mastering Home Organization
You're ready to take control of your space and transform it into a haven of calm and productivity. Mastering home org...

